Menu
Home Mediterranean Diet Anti-Inflammatory Recipes Keto Recipes Recipes Articles About Us Contact Us

Sicilian Caponata (Sweet and Sour Eggplant Stew)

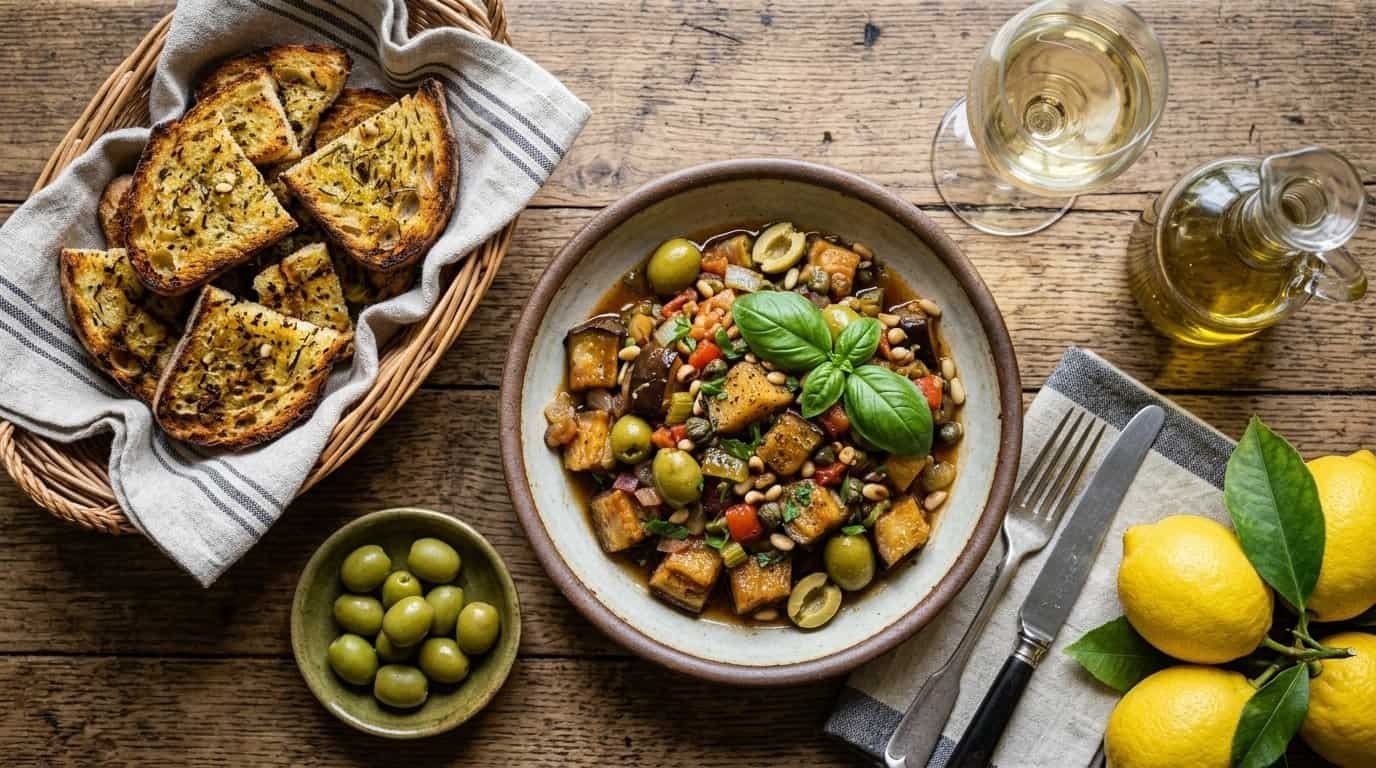
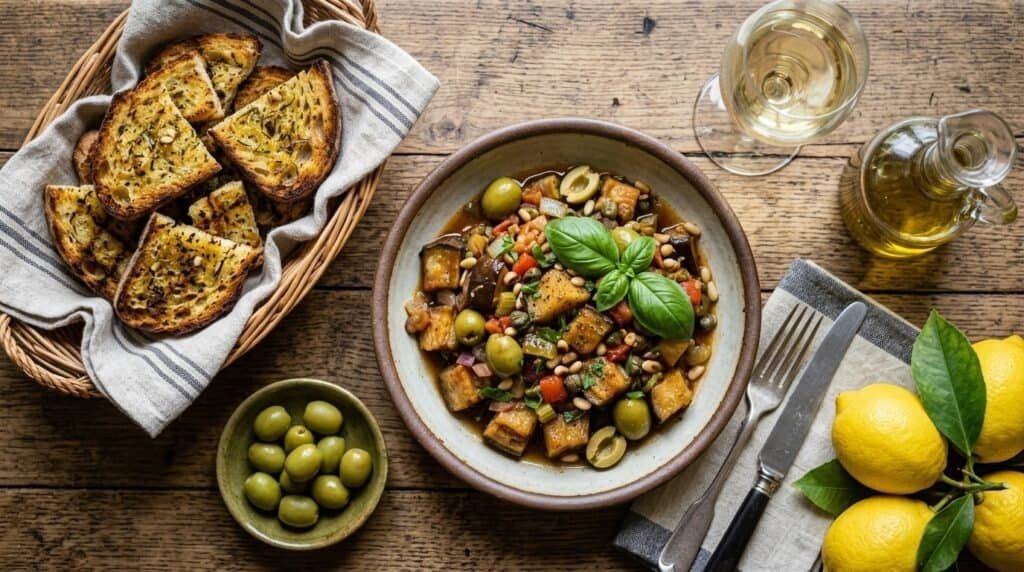
Some dishes get better the longer they sit. Caponata is one of them. It is a Sicilian eggplant stew built on a simple idea: soft, silky eggplant, sweet onion, juicy tomato, salty olives and capers, all pulled together with a splash of vinegar and a touch of sugar. The result is a bowl that tastes sweet, tangy, salty and rich at once.

It works as a side dish, a topping for toasted bread, a pasta sauce, or a main course with a green salad. It is also very forgiving. It tastes good warm, at room temperature or cold from the fridge, and it holds up for days.

This guide covers the ingredients, the cooking method, the small steps that keep the eggplant from turning greasy or mushy, how to balance the sweet and sour, and how to serve and store it.

What Is Caponata?

Caponata comes from Sicily, where it is served as an antipasto or a side dish. The flavor is called agrodolce, Italian for sweet and sour. Recipes vary from town to town. Some add peppers, some add raisins, some use almonds instead of pine nuts. The version here follows the classic idea: eggplant, celery, onion, tomato, green olives, capers, vinegar and a little sugar.

What makes it different from a typical vegetable stew is the vinegar and sugar. They cut through the richness of the olive oil and eggplant and give the dish its signature tang.

Ingredient Notes

  • Eggplant: Choose firm eggplants that feel heavy for their size with smooth, shiny skin. Small to medium ones have fewer seeds and less bitterness. Leave the skin on. It holds the cubes together and adds color.
  • Olive Oil: Eggplant soaks up oil like a sponge, which is why this recipe uses a generous amount. A good extra virgin olive oil adds flavor, so it is worth using here.
  • Green Olives: Mild, buttery varieties like Castelvetrano work well. Strongly brined olives can overpower the dish, so taste one first.
  • Capers: Rinse them well. Brined capers add a sharp, salty pop, and rinsing keeps the dish from turning too salty.
  • Tomatoes: Canned diced tomatoes give steady results year-round. In peak summer, about 1½ cups of chopped ripe tomatoes work well too.
  • Vinegar and Sugar: These two build the sweet and sour balance. Red wine vinegar is classic. White wine vinegar works as a substitute.
  • Pine Nuts: They add a soft, buttery crunch. They are expensive, so slivered almonds are a good substitute.

Pro Preparation & Cooking Rules

⚠️ Critical Step: Cook the Eggplant in Batches! Crowding the pan steams the eggplant instead of browning it, which gives gray, mushy cubes. Cook in two batches with room between pieces so each cube gets golden edges. This step decides the final texture of the whole dish.
⚠️ Critical Step: Add the Vinegar and Sugar Together, Then Taste! Stir in the vinegar and sugar at the same time so they balance each other. Let it cook for a couple of minutes, then taste. If it is too sharp, add a pinch more sugar. If it is too sweet, add a small splash of vinegar.
⚠️ Critical Step: Let It Rest Before Serving! Take the pan off the heat and let the caponata sit for at least 20 minutes. Flavors blend as it cools, and the vinegar mellows. Caponata tastes noticeably better after resting, and even better the next day.

Tips for Better Caponata & Common Mistakes

  • Keep Cubes Uniform: Even pieces cook at the same speed so none turn to mush while others stay firm.
  • Use a Wide Pan: More surface area means better browning and faster evaporation, yielding a thicker sauce.
  • Toast Pine Nuts Dry: Warm them in a dry pan for 2 to 3 minutes, shaking often, until lightly golden. Watch closely as they burn fast.
  • Don’t Overcrowd or Overcook: Overcrowding steams the eggplant. Cook until soft but still holding its shape.
  • Don’t Serve Right Away: Freshly cooked caponata tastes flatter and sharper. Resting is what rounds it out.

Variations Worth Trying

  • Add Bell Pepper: Dice half a red or yellow bell pepper and cook it with the onion for extra sweetness and color.
  • Add Raisins: Stir in 2 tablespoons of golden raisins with the olives for a traditional Sicilian sweet touch.
  • Use Almonds: Swap pine nuts for toasted slivered almonds.
  • Make It Spicier: Increase red pepper flakes or add a sliced fresh chili with the garlic.
  • Add Fresh Mint: A little chopped mint at the end gives a bright, cool contrast.
  • Roast the Eggplant: For less oil, toss cubes with 2 tablespoons of oil and roast at 425°F (220°C) for 20 to 25 minutes before adding to the sauce.

How to Serve Caponata

  • On toasted bread as a starter or snack (crostini/bruschetta).
  • Alongside grilled fish or chicken.
  • Tossed with warm pasta for a quick main.
  • Over polenta or creamy white beans.
  • As part of a mezze or antipasto board with cheese, cured meats, and marinated vegetables.
  • Spooned over a sandwich with fresh mozzarella.
  • Wine Pairing: Crisp dry white wine (Vermentino or Grillo) or a light red (Nero d’Avola).

Make-Ahead, Storage, and Reheating

Make Ahead: Caponata is better made a day in advance. Store covered in the fridge overnight, then bring to room temperature before serving.

Storing Leftovers: Keep in an airtight container in the refrigerator for up to 5 days.

Reheating: Serve cold, room temperature, or warm gently in a pan over low heat for 5 to 8 minutes.

Freezing: Freeze in an airtight container for up to 2 months. Thaw overnight in the fridge. (Eggplant softens slightly upon thawing, but flavor remains great).

Frequently Asked Questions

Do I have to salt the eggplant?
Not always. Salting helps with bitterness and oil absorption, especially for larger/older eggplants. Small, fresh ones are fine without it.

Why is my caponata too sour?
Too much vinegar or not enough sugar. Add a pinch of sugar, simmer for a minute, and taste again. Resting also softens sharpness.

Why is my caponata too oily?
Eggplant absorbs oil fast. Drying cubes well and browning in batches helps. You can also blot lightly with paper towels or use the roasting method.

Can I make caponata without capers?
Yes, but it loses some salty punch. Add a few extra olives to compensate.

Can I use frozen eggplant?
Not ideal as it releases water and turns soft. Fresh gives much better texture.

Is caponata vegan?
Yes, as written. It contains no gluten, dairy, or eggs (bread is the only gluten source).

Can I serve it hot?
Yes, but many prefer room temperature where flavors are fullest.

What can I use instead of pine nuts?
Toasted almonds, walnuts, or sunflower seeds all work well.
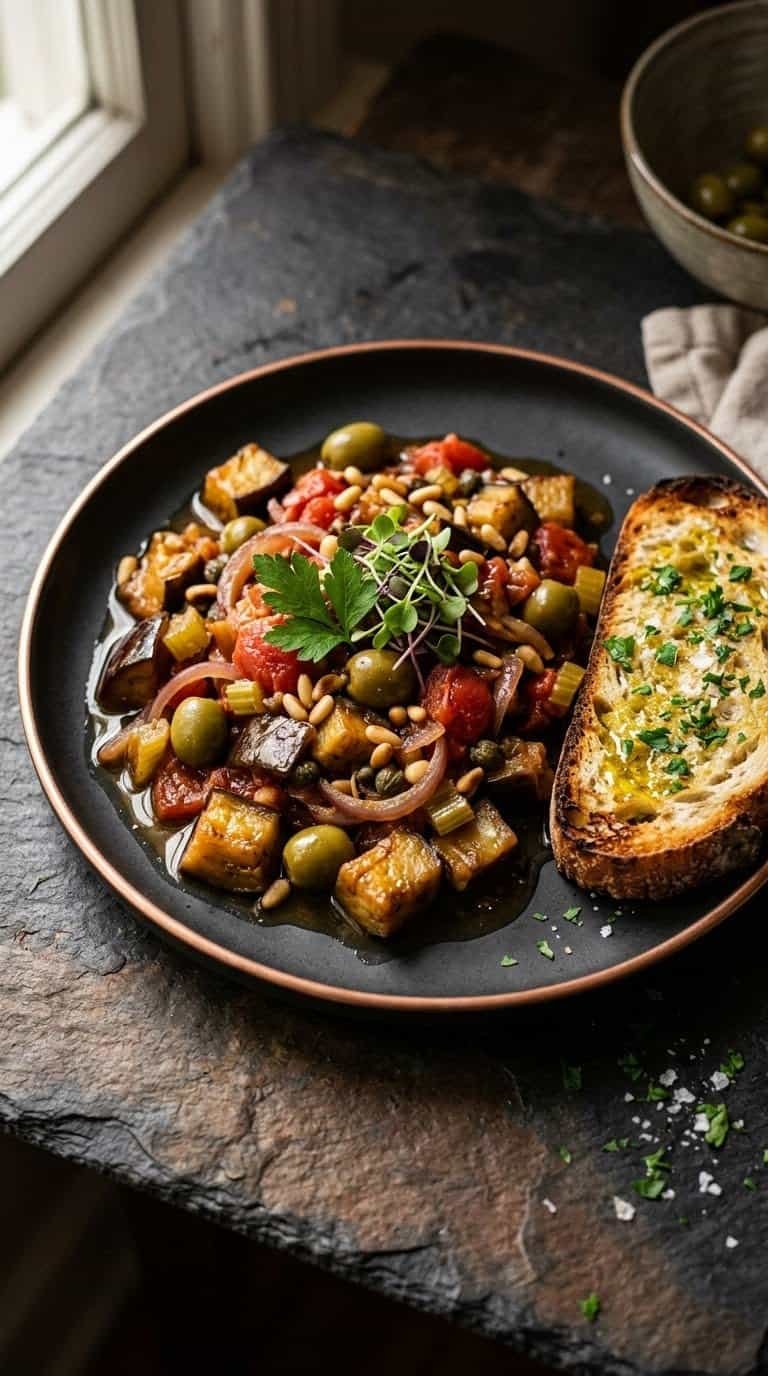
Sicilian Caponata (Sweet and Sour Eggplant Stew)

A classic Sicilian sweet and sour eggplant stew with celery, onions, tomatoes, olives, capers, and pine nuts, served warm, room temperature, or chilled with garlic toast.
Prep Time 20 minutes
Cook Time 40 minutes
Total Time 1 hour
Servings: 6 peoples
Course: Appetizer, Side Dish
Cuisine: Italian, Sicilian

Ingredients
  

For the Caponata:
  • 2 medium eggplants about 1½ lb / 680 g, cut into ¾-inch cubes
  • 1 tsp salt for optional salting
  • 1/3 cup 80 ml extra virgin olive oil, divided
  • 1 large yellow onion thinly sliced
  • 2 celery stalks diced
  • 3 garlic cloves minced
  • 1 can 14.5 oz / 410 g diced tomatoes, with juices
  • 1/2 cup 75 g pitted green olives, halved
  • 2 tbsp capers drained and rinsed
  • 2 tbsp red wine vinegar
  • 1 tbsp sugar
  • 1/4 tsp black pepper
Pinch of red pepper flakes (optional)
  • 2 tbsp pine nuts toasted
  • 2 tbsp chopped fresh parsley or basil
For the Garlic Toast:
  • 6 slices crusty bread
  • 2 tbsp olive oil
  • 1 garlic clove halved
Pinch of flaky salt

Method
 

  1. Optional Salting: Toss cubed eggplant with 1 tsp salt in a colander and let sit for 30 minutes. Rinse briefly and pat completely dry.

  2. Brown Eggplant: Heat 3 tbsp olive oil in a wide skillet over medium-high heat. Brown half the eggplant for 5–6 minutes. Move to a plate, add 2 tbsp oil, and brown the second batch. Set aside.
  3. Soften Vegetables: Lower heat to medium, add 1 tbsp oil, sliced onion, diced celery, and a pinch of salt. Cook 7–8 minutes until soft and golden.
  4. Add Garlic: Stir in minced garlic and red pepper flakes. Cook 1 minute until fragrant.
  5. Simmer Tomatoes: Add diced tomatoes with juices. Simmer for 10 minutes until sauce thickens slightly.
  6. Sweet and Sour: Stir in red wine vinegar and sugar together. Cook 2 minutes, taste, and adjust sweetness/sourness if needed.
  7. Combine & Finish: Return eggplant to the pan along with green olives, capers, and black pepper. Cover partially and simmer on low for 10 minutes until silky and tender.
  8. Rest: Remove from heat and let sit for at least 20 minutes for flavors to meld.
  9. Garlic Toast: Brush bread slices with olive oil and toast at 400°F (200°C) for 5–6 minutes. Rub warm slices with garlic clove and sprinkle with flaky salt.
  10. Serve: Top caponata with toasted pine nuts and fresh herbs. Serve warm or at room temperature with garlic toast.
Jump to Recipe

Cheesy Garlic Butter Shrimp Stuffed Fish Rolls

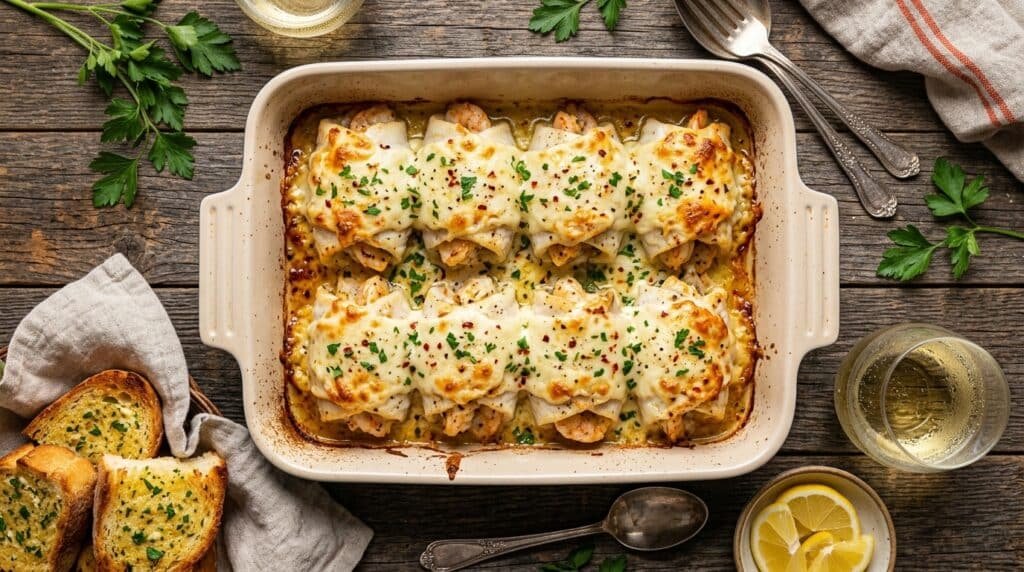
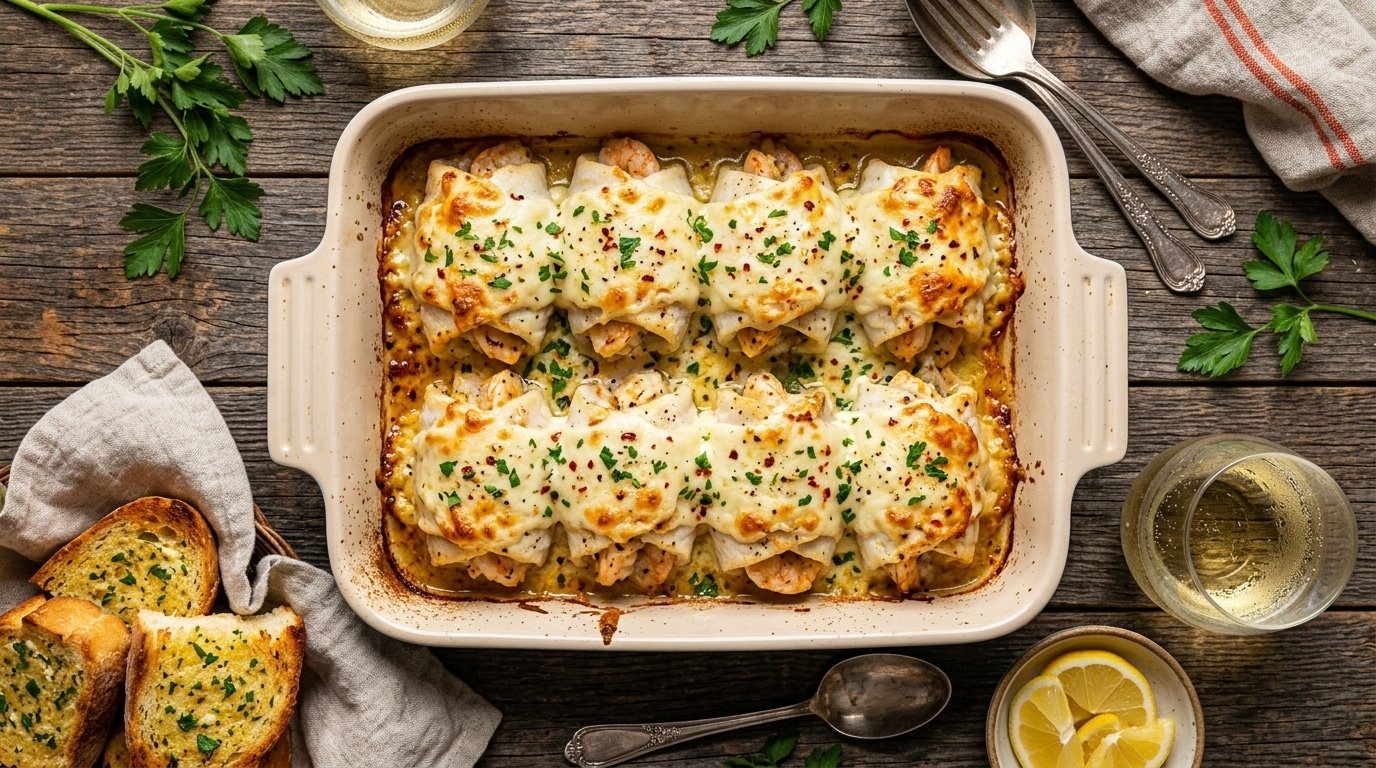
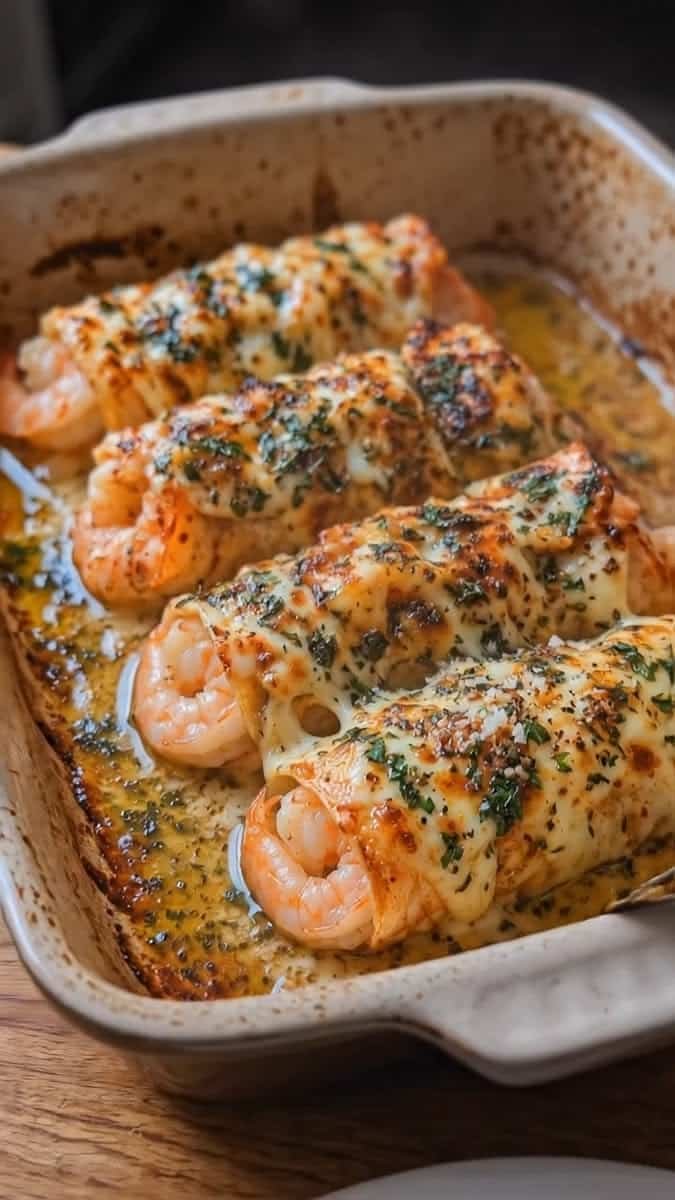
Some dishes look like they came from a restaurant kitchen but take about 40 minutes at home. These shrimp stuffed fish rolls are one of them. Tender white fish is wrapped around plump shrimp, baked in a pool of garlic butter, then blanketed in bubbling golden cheese and finished with fresh parsley.

Each slice shows a juicy shrimp tucked into flaky fish, and the butter at the bottom of the dish is made for spooning over everything. It works for a weeknight dinner or a dinner party, and the work is mostly rolling and baking.

This guide covers everything: choosing the fish, rolling without tearing, keeping the shrimp tender, getting the cheese golden without drying anything out, plus swaps, storage, and answers to common questions.

Why This Recipe Works

  • Two Seafoods, One Dish: Mild flaky fish and sweet shrimp give you two textures in every bite.
  • Self-Building Butter Sauce: Garlic, lemon, and paprika go into the baking dish and the fish juices blend into it as it cooks. No separate pan or whisking needed.
  • Impressive Appearance: Rolling is the only slightly fiddly step, and simple techniques make it easy.
  • Fits a Lighter Plate: One roll per person is satisfying but not heavy, especially with a salad or roasted vegetables.

Choosing the Right Fish & Shrimp

Choosing the Fish

The fish decides whether this dish works. You need thin, flexible fillets that bend around the shrimp without cracking:

  • Sole or Flounder: Thin, delicate, and made for rolling. These are the first choice.
  • Tilapia: Easy to find, affordable, and flexible.
  • Thin Cod or Haddock: Works if you slice thick fillets in half horizontally.
  • Basa or Swai: Mild and widely available frozen.

Avoid thick fillets like salmon steaks or halibut. They crack when rolled and cook unevenly around the shrimp. Aim for fillets about 5 to 6 ounces each and 1/4 to 1/2 inch thick. If a fillet is thicker, lay it flat and gently pound it with a rolling pin between two sheets of parchment.

Choosing the Shrimp

Use large shrimp, peeled and deveined, around 21 to 25 per pound. Three shrimp per roll fits neatly. Smaller shrimp can work, but use four or five per roll so every bite has some.

Raw shrimp works best here. Pre-cooked shrimp turns rubbery by the time the fish is done. If you buy frozen shrimp, thaw them overnight in the fridge or under cold running water for a few minutes, then dry them very well.

Critical Steps for Texture & Flavor

⚠️ Critical Step: Pat Everything Dry! Press paper towels firmly onto the fish and shrimp before seasoning. Surface moisture steams the fish instead of letting it bake, and it waters down the butter sauce. This one step makes the biggest difference to texture.
⚠️ Critical Step: Roll Tight, Seam Down! Place each roll seam side down in the dish. The weight of the fish holds the seam closed as it cooks. If a roll keeps opening, secure it with a toothpick and remove it before serving. Let the shrimp ends peek out at the open end for visual presentation and to check doneness easily.
⚠️ Critical Step: Add the Cheese Late! Cheese goes on only after the first 12 minutes of baking. If it bakes the whole time, it browns too early and the fish dries out underneath. Adding it late gives you a melted, golden top and tender fish.

Tips for Perfect Results & Common Mistakes

  • Dry Fish Rolls Better: Besides preventing steaming, a dry surface helps seasoning stick.
  • Don’t Overstuff: Three shrimp per roll is the sweet spot. More makes the fillet tear or bulge open.
  • Use a Snug Dish: A dish that is too large lets the butter spread thin and burn at the edges. An 8×11-inch baking dish is ideal.
  • Check Temperature: An instant-read thermometer takes the guesswork out of seafood — 145°F (63°C) for the fish is the target.
  • Avoid Pre-cooked Shrimp: Pre-cooked options overcook and turn rubbery during baking.

Variations Worth Trying

  • Spicy Version: Add ½ tsp cayenne or Cajun seasoning to the spice mix and a bit more red pepper flakes to the butter.
  • Spinach & Cream Cheese Filling: Spread a thin layer of softened cream cheese and a few spinach leaves on each fillet before adding the shrimp.
  • Lemon Herb Version: Skip the paprika and add lemon zest, dill, and thyme to the butter.
  • Crispy Topping: Mix 2 tbsp panko with a little melted butter and sprinkle it over the cheese before the final bake.

Serving Ideas, Storage, and Reheating

What to Serve With: Rice or buttered orzo to soak up the garlic butter, roasted asparagus, a crisp green salad, or crusty bread.

Make Ahead: Roll the fish and shrimp up to 6 hours ahead, place in the dish, cover, and refrigerate. Add butter and cheese just before baking.

Storage: Cool, then refrigerate in an airtight container for up to 2 days.

Reheating: Warm in a 300°F (150°C) oven, covered loosely with foil, for 10 to 12 minutes. Microwaving tends to toughen shrimp.

Frequently Asked Questions

Can I use frozen fish fillets?
Yes. Thaw them fully in the refrigerator overnight, then pat them very dry. Frozen fish holds more water, so extra drying matters.

What if my fillets keep tearing?
They are probably too thick or too cold. Pound thick fillets gently between parchment, and let cold fillets sit out for 10 minutes so they flex more easily.

How do I know the shrimp is cooked inside the roll?
Look at the exposed end. The shrimp should be pink and opaque. If you are unsure, cut one roll open to check.

Is this dish gluten-free?
As written, yes, as long as your seasonings and cheese contain no added gluten (skip the optional panko topping).

Cheesy Garlic Butter Shrimp Stuffed Fish Rolls

Thin white fish fillets wrapped around juicy shrimp, baked in garlic lemon butter, and topped with golden melted mozzarella and Parmesan cheese.
Prep Time 20 minutes
Cook Time 22 minutes
Total Time 42 minutes
Servings: 4 peoples
Course: Main Course
Cuisine: American

Ingredients
  

For the Rolls:
  • 4 thin white fish fillets 5 to 6 oz each, such as sole, flounder, or tilapia
  • 12 large raw shrimp peeled and deveined (tails removed)
  • 1/2 tsp salt
  • 1/4 tsp black pepper
  • 1/2 tsp garlic powder
  • 1/2 tsp paprika
For the Garlic Butter:
  • 4 tbsp 57 g unsalted butter, melted
  • 1 tbsp olive oil
  • 5 garlic cloves minced
  • 1 tbsp fresh lemon juice
  • 1/2 tsp paprika
  • Pinch of red pepper flakes optional
  • 1 tbsp chopped fresh parsley
For the Cheese Topping & Serving:
  • 1 cup shredded mozzarella about 4 oz
  • 1/4 cup grated Parmesan
  • 1 tbsp chopped fresh parsley for finishing
Lemon wedges

Method
 

  1. Prep Oven & Dish: Heat oven to 400°F (200°C). Use an 8×11-inch baking dish that holds the four rolls snugly.
  2. Make Garlic Butter: Stir together melted butter, olive oil, minced garlic, lemon juice, paprika, red pepper flakes, and 1 tbsp parsley. Pour two-thirds into the baking dish and spread across the bottom. Save the rest for brushing.
  3. Dry & Season: Pat fish fillets and shrimp dry with paper towels. Mix salt, pepper, garlic powder, and 1/2 tsp paprika, then sprinkle evenly over fish and shrimp.
  4. Fill & Roll: Place 3 shrimp at the wide end of each fillet. Roll up snugly and place seam side down in the baking dish.
  5. First Bake: Brush tops with remaining garlic butter. Bake uncovered for 12 minutes until fish turns opaque at edges.
  6. Add Cheese: Sprinkle mozzarella and Parmesan evenly over rolls. Spoon a little butter from the dish over cheese.
  7. Finish Baking: Return to oven for 8 to 10 minutes until cheese is melted and bubbly with golden spots (broil 1–2 mins if deeper browning is desired).
  8. Rest & Serve: Check that fish reaches 145°F (63°C) and shrimp is pink. Rest 3 minutes. Top with fresh parsley and serve hot with lemon wedges.
Jump to Recipe

Buffalo Chicken Stuffed Eggplant — The Low Carb Dinner That Tastes Like Pure Comfort Food

Some recipes just make sense the moment they hit the table[cite: 15]. The problem here is wanting something indulgent, saucy and deeply satisfying without the heaviness that comes with bread, pasta or rice[cite: 15]. Buffalo chicken stuffed eggplant solves that problem completely[cite: 15].

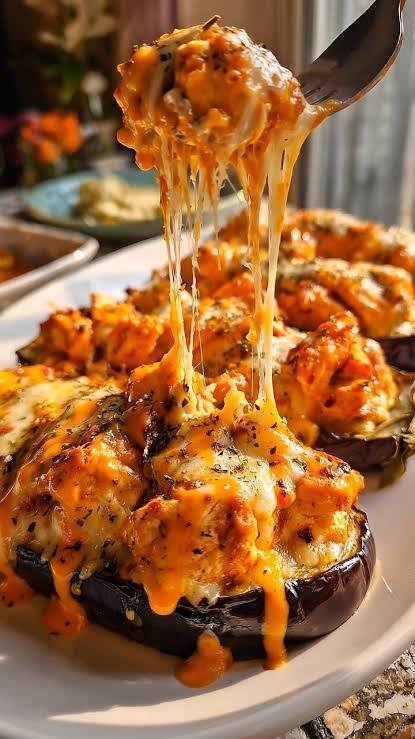
Tender roasted eggplant halves with caramelized charred edges acting as the vessel[cite: 15]. Spicy tangy buffalo chicken filling piled generously on top, golden and slightly crisped from the oven[cite: 15]. Melted cheese bubbling across the surface[cite: 15]. Cool creamy ranch or blue cheese drizzle cutting through the heat[cite: 15]. Fresh green onions scattered on top adding brightness and color[cite: 15]. Every single element of a great buffalo chicken dish just served inside a roasted eggplant instead of a bun or a bowl of pasta[cite: 15].

The result is something that feels genuinely indulgent while being naturally low carb, gluten free and packed with protein and vegetables[cite: 15]. It looks impressive enough for a dinner party and comes together easily enough for a regular weeknight[cite: 15]. That combination is rare and this recipe delivers it every single time[cite: 15].

Why Eggplant Works So Perfectly Here

Eggplant is one of the most underutilized vegetables in home cooking and this recipe demonstrates exactly why that is a mistake[cite: 15]. When roasted properly eggplant develops a deeply savory almost meaty quality that makes it one of the few vegetables substantial enough to anchor an entire main course rather than playing a supporting role[cite: 15].

The flesh becomes tender and slightly creamy after roasting while the skin firms up and holds its shape perfectly as a natural edible bowl[cite: 15]. No additional container needed[cite: 15]. No bread required[cite: 15]. The eggplant does everything[cite: 15].

Mild earthy roasted eggplant and bold saucy fillings just work together no explanation needed after the first bite[cite: 15]. It does not compete, it complements[cite: 15]. The buffalo chicken filling is aggressive and bold[cite: 15]. The eggplant underneath is mellow and grounding[cite: 15]. Together they create a balance that makes every forkful interesting rather than overwhelming[cite: 15].

Breaking Down Every Ingredient

Eggplant

Large globe eggplants work best for this recipe[cite: 15]. They have the size and depth to hold a generous amount of filling without spilling over[cite: 15]. Look for eggplants that feel heavy for their size with smooth tight skin and no soft spots or wrinkles[cite: 15]. A firm fresh eggplant will hold its shape during roasting and stay structured enough to eat as a vessel[cite: 15]. Medium sized eggplants also work well for individual single serve portions[cite: 15]. One half per person makes a satisfying serving especially when paired with a simple side salad[cite: 15].

⚠️ Critical Step: Salt the cut eggplant halves and let them sit for 20 to 30 minutes before roasting[cite: 15]. This process draws out excess moisture and any bitterness from the flesh[cite: 15]. After salting pat the eggplant completely dry with paper towels before adding oil and roasting[cite: 15]. Skipping this step results in watery eggplant that steams rather than roasts in the oven and never develops those beautiful caramelized edges[cite: 15].

Chicken

Cooked shredded chicken is the base of the filling[cite: 15]. Rotisserie chicken is the most convenient option and produces excellent results as the pre-seasoned meat adds an extra layer of flavor that plain boiled chicken does not have[cite: 15]. Two chicken breasts poached and shredded work equally well for a leaner result[cite: 15]. The chicken needs to be shredded rather than diced for the best texture[cite: 15, 16]. Shredded chicken absorbs the buffalo sauce more completely and creates a filling that holds together properly[cite: 16].

Buffalo Sauce & Cream Cheese

Frank’s RedHot is the gold standard for buffalo sauce and what most people think of when they imagine classic buffalo flavor[cite: 16]. It has the right balance of vinegar tang, heat and flavor[cite: 16]. Mixing a small amount of melted butter into the buffalo sauce before combining with the chicken creates a smoother richer coating[cite: 16]. A few tablespoons of softened cream cheese mixed into the buffalo chicken filling smooths out the sharp edges of the hot sauce and creates a creamy cohesive filling that holds together[cite: 16]. Bring cream cheese to room temperature so it blends smoothly without lumps[cite: 16].

Shredded Cheese

Mozzarella melted over the top creates that golden bubbly cheese layer that makes this dish look irresistible[cite: 16]. Monterey Jack works equally well and has slightly more flavor[cite: 16]. A combination of both is genuinely excellent[cite: 16].

⚠️ Critical Step: Add the cheese during the last 8 to 10 minutes of baking rather than at the beginning[cite: 16]. Cheese added too early over-browns and dries out before the filling is properly heated through[cite: 16]. Cheese added in the final minutes melts perfectly – golden on top, still stretchy and creamy underneath[cite: 16].

Dressing & Green Onions

The cool creamy drizzle over the top is essential[cite: 16]. Ranch is more universally appealing, while blue cheese is the traditional buffalo pairing[cite: 16]. Fresh sliced green onions finish the dish with color, freshness and a mild savory sharpness[cite: 16]. Add them after the dish comes out of the oven so they stay fresh and vibrant green[cite: 16].

Serving Suggestions

  • As a Main Course: Two stuffed eggplant halves per person makes a complete satisfying meal alongside a simple green salad[cite: 18].
  • As a Starter: One half per person works as a substantial appetizer before a lighter main course[cite: 18].
  • Side Pairings: Celery sticks and carrot sticks on the side pay homage to classic buffalo wings[cite: 18]. Cucumber slices work equally well[cite: 18].
  • Grain Addition: A side of cauliflower rice keeps the dish low carb while adding volume[cite: 18]. Regular steamed rice or quinoa also work[cite: 18].

Variations Worth Trying

  • BBQ Chicken Version: Replace buffalo sauce with barbecue sauce[cite: 18]. Use smoked gouda instead of mozzarella and top with crispy fried onions[cite: 18].
  • Vegetarian Version: Replace chicken with a mixture of cooked chickpeas and diced cauliflower tossed in buffalo sauce[cite: 18].
  • Mediterranean Version: Replace buffalo chicken with seasoned ground lamb or beef, diced tomatoes, feta cheese, and a tahini drizzle with fresh mint[cite: 18].
  • Extra Spicy Version: Add a tablespoon of sriracha to the buffalo sauce, use pepper jack cheese, and top with thinly sliced fresh jalapeños[cite: 18].

Make Ahead and Storage

Make Ahead: The buffalo chicken filling can be made up to 2 days ahead and stored in an airtight container in the refrigerator[cite: 19]. The eggplant can be roasted up to one day ahead[cite: 19]. Assemble and bake fresh when ready to serve[cite: 19].

Storing Leftovers: Store in an airtight container in the refrigerator for up to 3 days[cite: 19].

Reheating: Reheat in a 350°F oven for 10 to 12 minutes[cite: 19]. Cover loosely with foil for the first 8 minutes, then remove foil to re-crisp the cheese[cite: 19]. Microwave reheating is not recommended as it makes the eggplant watery[cite: 19].

Freezing: This dish does not freeze well due to the high water content of eggplant[cite: 19].

Frequently Asked Questions

Does eggplant need to be peeled before roasting?
No[cite: 19]. The skin of the eggplant is completely edible and serves as the natural vessel that holds the filling[cite: 19].

Can this be made with ground chicken instead of shredded?
Yes[cite: 19]. Cook ground chicken in a skillet with garlic, onion powder, and salt, then mix with buffalo sauce, butter, and cream cheese[cite: 19].

How spicy is this dish?
At the amount listed the heat level is moderate[cite: 19]. To make it milder, reduce buffalo sauce to 3 tablespoons[cite: 19]. For more heat, add cayenne pepper or extra sauce[cite: 19].

Can smaller eggplants be used?
Yes[cite: 19]. Japanese or smaller Italian eggplants cook in 20 to 22 minutes[cite: 19].

What can replace cream cheese in the filling?
Greek yogurt or sour cream make lighter substitutes[cite: 19]. Reduce the amount slightly as both have more moisture[cite: 19].

Is this recipe keto friendly?
Yes[cite: 19]. Eggplant and buffalo chicken filling with cream cheese are naturally keto compliant[cite: 19].

Buffalo Chicken Stuffed Eggplant

Tender roasted eggplant halves stuffed with spicy buffalo chicken filling, topped with melted mozzarella and Monterey Jack cheese, cool ranch, and green onions.
Prep Time 34 minutes
Cook Time 40 minutes
Total Time 1 hour 40 minutes
Servings: 4 people
Course: Main Course
Cuisine: American

Ingredients
  

Eggplant:
  • 2 large eggplants halved lengthwise
  • 2 tbsp olive oil
  • 1 tsp garlic powde
Salt, pepper and kosher salt
Buffalo Chicken Filling:
  • 2 cups cooked chicken shredded
  • 1/3 cup buffalo sauce
  • 2 tbsp butter melted
  • 3 tbsp cream cheese softened
  • 1/2 tsp garlic powder
  • 1/2 tsp onion powder
Topping:
  • 1 cup mozzarella shredded
  • 1/2 cup Monterey Jack shredded
Ranch or blue cheese dressing for drizzling
  • 4 green onions sliced
Fresh parsley

Method
 

  1. Score and Salt: Slice eggplants in half lengthwise and score flesh in a crosshatch pattern. Sprinkle kosher salt and rest for 25–30 minutes. Pat completely dry with paper towels.
  2. Roast Eggplant: Brush with olive oil and garlic powder. Roast cut side down at 400°F for 20 minutes. Flip cut side up and roast for 10 more minutes until tender.
  3. Make Filling: Mix shredded chicken, buffalo sauce, melted butter, softened cream cheese, garlic powder, and onion powder until smooth and combined.
  4. Fill Eggplant: Press down center of roasted eggplant flesh to create wells. Fill generously with buffalo chicken mixture.
  5. Add Cheese & Bake: Top with mixed mozzarella and Monterey Jack cheese. Return to 400°F oven for 8 to 10 minutes until golden and bubbling.
  6. Finish & Serve: Rest 3 minutes. Drizzle with ranch/blue cheese dressing and top with sliced green onions and fresh parsley. Serve hot.
Jump to Recipe

Lemon Garlic Chicken with Roasted Vegetable

Why You’ll Love This Recipe

Some nights you just need one pan, one oven, and about thirty minutes — that’s exactly what this recipe delivers. Featuring tender chicken thighs roasted alongside zucchini, bell peppers, and red onion, this meal is coated in a bright lemon-garlic marinade before hitting the oven, giving you crispy golden skin and perfectly caramelized vegetables in under 45 minutes.

What sets this dish apart from a basic tray bake is its Mediterranean foundation — extra virgin olive oil, fresh garlic, lemon, and dried oregano bring authentic depth of flavor without relying on heavy sauces or excess sodium. Whether you need a fast weeknight dinner or want to prep ahead for the week, this one-pan chicken delivers minimal cleanup and maximum flavor.

Why This Recipe Fits the Mediterranean Diet

The Mediterranean diet centers on whole foods, fresh vegetables, lean proteins, and heart-healthy fats. This recipe reflects those core principles in every ingredient:

  • Lean Protein: Bone-in chicken thighs provide juicy, flavorful protein while roasting evenly alongside the vegetables.
  • Healthy Fats: Extra virgin olive oil forms the base of the marinade, delivering heart-healthy monounsaturated fats and helping the lemon and garlic cling to every piece.
  • Fiber & Antioxidants: Zucchini, bell peppers, and red onion add color, vitamin C, and dietary fiber to support digestion and overall health.
  • Herb-Forward Seasoning: Dried oregano and fresh garlic build bold flavor naturally, without relying on processed sauces or excess salt.

Visual & Flavor Alignment

To recreate the golden, caramelized look of this dish, here’s how each ingredient contributes to both appearance and flavor:

IngredientVisual PresentationMediterranean Diet Role
Chicken ThighsGolden, crispy skin, deep amber colorHigh-protein, juicy foundation
Zucchini Bright green half-moons with charred edgesHydrating, low-carb vegetable
Bell Peppers Vibrant red & yellow chunksSweetness, vitamin C, color contrast
Red Onion Soft, slightly caramelized wedges Natural sweetness, antioxidants
Garlic & Lemon Visible marinade coating, glossy finishBright acidity, antioxidant boost

Ingredients & Substitutions Guide

Gather these measured ingredients to recreate the dish with maximum flavor:

Core Ingredients

4 bone-in chicken thighs
1 medium zucchini, sliced into half-moons
1 red bell pepper, cut into chunks
1 yellow bell pepper, cut into chunks
1/2 red onion, cut into wedges
3 tbsp extra virgin olive oil
3 cloves garlic, minced

Lemon Garlic Chicken with Roasted Vegetables

A one-pan dinner where chicken thighs roast alongside zucchini, peppers, and red onion, all tossed in lemon, garlic, and oregano before hitting the oven.
Prep Time 10 minutes
Cook Time 35 minutes
Servings: 4 people
Course: Dinner
Cuisine: Mediterranean
Calories: 414

Ingredients
  

  • 4 bone-in chicken thighs
  • 1 zucchini | sliced into half-moons
  • 1 red bell pepper | cut into chunks
  • 1 yellow bell pepper | cut into chunks
  • 1 red onion | cut into wedges
  • 3 tbsp | extra virgin olive oil
  • 3 garlic cloves | minced
  • 1 lemon | juiced and zested
  • 1 tbsp | dried oregano
  • 1/2 tsp | sea salt
  • 1/2 tsp | cracked black pepper

Equipment

  • 1 Sheet pan

Method
 

  1. Preheat oven to 400°F (200°C). Line a large sheet pan with parchment paper.
  2. In a small bowl, whisk together olive oil, garlic, lemon juice, lemon zest, oregano, salt, and pepper.
  3. Place chicken thighs and vegetables on the sheet pan. Pour the marinade over everything and toss to coat evenly.
  4. Arrange chicken skin-side up. Roast for 35 minutes, until the chicken reaches an internal temperature of 165°F (74°C) and the skin is golden and crisp.
  5. Rest for 5 minutes, then serve straight from the pan.

Notes

– Chicken breasts can be substituted; reduce cook time by about 10 minutes.
– Storage: keep in an airtight container in the fridge for up to 3 days.
– Reheat in the oven at 350°F for 10 minutes to keep the skin crisp.
Jump to Recipe

Dinners You Can Make Tonight

All Recipes

Browse Our Recipes

Simple, weeknight-friendly recipes built around fresh ingredients — click any recipe below for the full step-by-step guide.

Honey Brie Roasted Sweet Potato Bites with Cranberries and Walnuts

Honey Brie Roasted Sweet Potato Bites with Cranberries and Walnuts

⏱ Prep: 15 min 🔥 Cook: 40 min

Crispy roasted sweet potato rounds topped with creamy melted brie, warm honey-glazed cranberries, and crunchy walnuts.

Read Full Recipe →
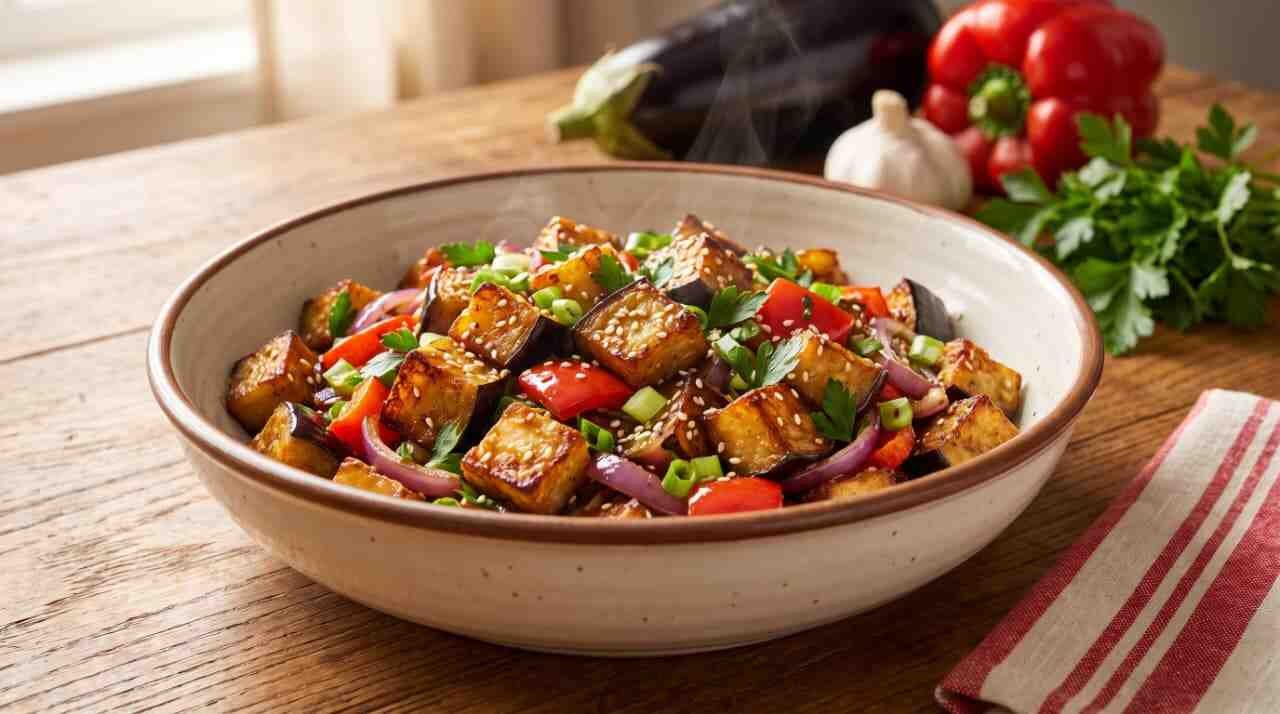
Crispy Sesame Eggplant with Red Peppers and Garlic Glaze

Crispy Sesame Eggplant with Red Peppers and Garlic Glaze

⏱ Prep: 15 min 🔥 Cook: 30 min

Golden roasted eggplant cubes and sweet bell peppers tossed in a savory, sweet garlic-soy glaze with toasted sesame seeds.

Read Full Recipe →
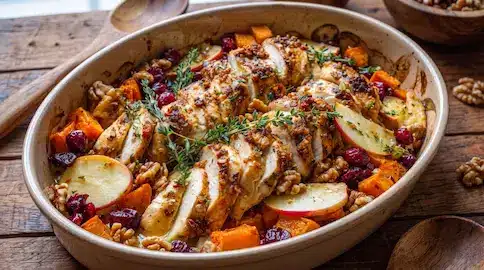
Harvest Roasted Chicken with Butternut Squash, Apples and Cranberries

Harvest Roasted Chicken with Butternut Squash, Apples and Cranberries

⏱ Prep: 20 min 🔥 Cook: 37 min

Juicy chicken breasts baked in a honey-Dijon garlic butter with caramelized butternut squash, apples, cranberries, and toasted walnuts.

Read Full Recipe →
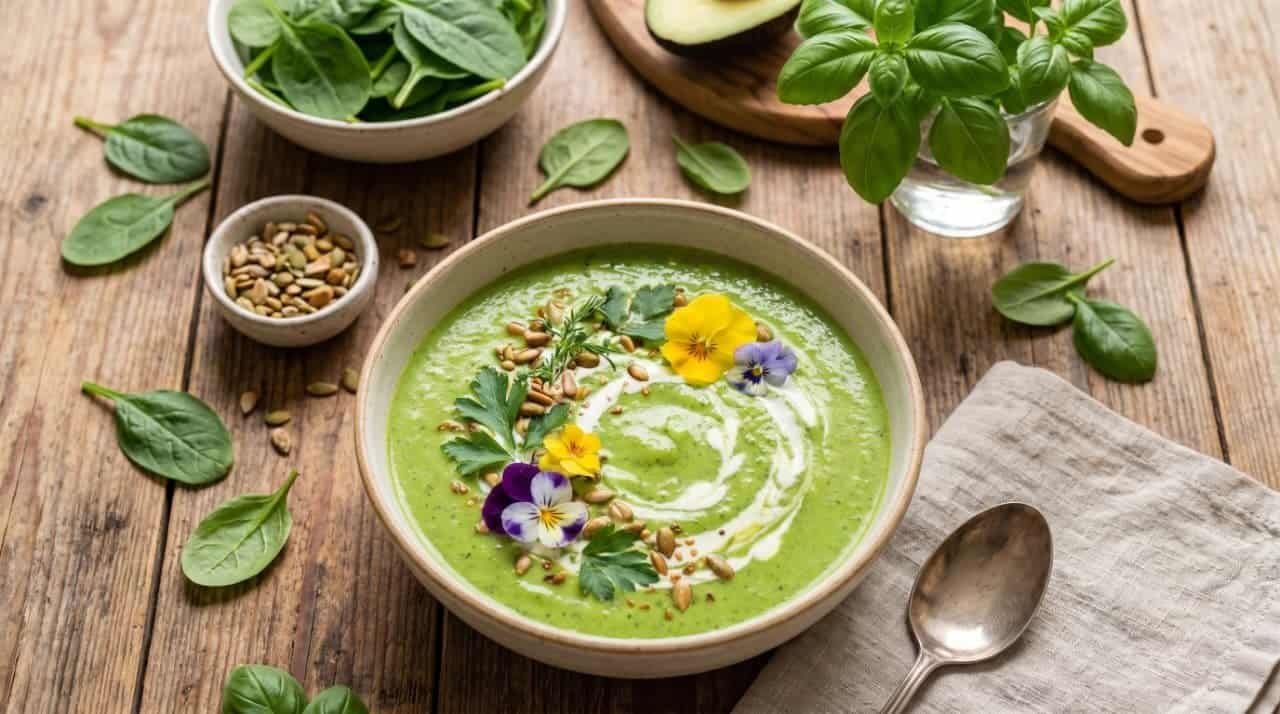
Green Goddess Soup with Spinach, Fresh Herbs and Lemon

Green Goddess Soup with Spinach, Fresh Herbs and Lemon

⏱ Prep: 15 min 🔥 Cook: 25 min

A vivid, silky green soup packed with spinach, soft herbs, potatoes, and lemon, topped with Greek yogurt and crunchy croutons.

Read Full Recipe →
Sicilian Caponata in a bowl with garlic toast

Sicilian Caponata (Sweet and Sour Eggplant Stew)

⏱ Prep: 20 min 🔥 Cook: 40 min

Silky eggplant, sweet onions, tomatoes, green olives, and capers simmered in a rich sweet and sour agrodolce sauce.

Read Full Recipe →
Cheesy Garlic Butter Shrimp Stuffed Fish Rolls

Cheesy Garlic Butter Shrimp Stuffed Fish Rolls

⏱ Prep: 20 min 🔥 Cook: 22 min

Tender white fish wrapped around juicy shrimp, baked in garlic lemon butter, and covered with bubbling golden mozzarella.

Read Full Recipe →
Buffalo Chicken Stuffed Eggplant

Buffalo Chicken Stuffed Eggplant

⏱ Prep: 35 min 🔥 Cook: 40 min

Tender roasted eggplant halves stuffed with spicy buffalo chicken filling, melted cheeses, and a cool ranch drizzle.

Read Full Recipe →
Pineapple Cheese Ball with toasted pecans

Pineapple Cheese Ball

⏱ Prep: 20 min ❄️ Chill: 4 hr 30 min

A sweet & savory crowd-pleaser made with cream cheese, crushed pineapple, green onions, and toasted pecans.

Read Full Recipe →
Baked brie in puff pastry with honey and walnuts

Baked Brie in Puff Pastry with Honey, Walnuts and Cranberries

⏱ Prep: 15 min 🔥 Bake: 25 min

Golden flaky puff pastry wrapped around warm molten brie, topped with toasted walnuts, tart cranberries, and a honey drizzle.

Read Full Recipe →
Fresh crunchy salad bowl

Asian Crunch Salad

⏱ Prep: 15 min 🥣 Rest: 10 min

A no-cook, texture-packed salad with crunchy cabbages, mandarin oranges, and a homemade sesame ginger dressing that converts everyone.

Read Full Recipe →
Roasted chicken and vegetables on a sheet pan

Lemon Garlic Chicken with Roasted Vegetables

⏱ Prep: 10 min 🔥 Cook: 35 min

A one-pan dinner where chicken thighs roast alongside zucchini, peppers, and red onion, all tossed in lemon, garlic, and oregano before hitting the oven.

Read Full Recipe →