Menu
Home Mediterranean Diet Anti-Inflammatory Recipes Keto Recipes Recipes Articles About Us Contact Us

Honey Brie Roasted Sweet Potato Bites with Cranberries and Walnuts

Sweet potato, melted brie, honey and cranberries is a combination that works for a reason. The potato brings earthy sweetness, the brie adds creamy richness, the cranberries bring a tart chew, and the walnuts add crunch. A little thyme keeps it from tasting like dessert.

These bites start with thick sweet potato rounds roasted until the edges turn deep golden, then lightly pressed so the surface crisps and the inside stays soft. Each one is topped with a slice of brie, melted until glossy, then finished with a warm honey, cranberry and walnut mixture and a sprig of thyme. They look like something from a restaurant appetizer menu but need only a handful of ingredients and a single baking sheet.

They suit holiday tables, game-day spreads, fall dinner parties or a cozy side dish. This guide covers choosing the sweet potatoes, the method that gives crisp edges, the topping, swaps for different diets, serving ideas, storage, and answers to common questions.

Why This Recipe Works

  • Thick rounds hold up: A 1-inch slice stays soft inside and crisp outside, and it works as a sturdy base for toppings.
  • A light press adds surface area: Flattening the roasted rounds slightly creates more golden, crisp edges for the same amount of oil.
  • Brie melts without running: Added in the final minutes, it softens into a creamy layer instead of sliding off the plate.
  • The topping is cooked briefly: Warming honey, cranberries and walnuts for about 2 minutes keeps the nuts crunchy and the honey from scorching.
  • Sweet and savory stay balanced: Salt, pepper, thyme and a splash of vinegar stop the dish from tasting one-note sweet.
  • It is easy to scale: The bites roast on one pan and the topping takes minutes, so doubling it is simple.

Ingredient Notes

  • Sweet Potatoes: Choose firm potatoes with smooth skin and a fairly even, cylindrical shape, so the rounds come out a similar size. Orange-fleshed varieties such as Garnet or Jewel are sweet and moist. Leave the skin on, since it holds the rounds together and adds a pleasant chew.
  • Olive Oil: It handles the oven heat well and adds a light fruity note. Avocado oil is a good neutral alternative.
  • Brie: Brie is soft and mild with a creamy, buttery melt. A chilled wedge slices much more cleanly than a room-temperature one. The rind is edible and softens as it bakes, though it can be trimmed if a smoother look is preferred. Camembert is a close substitute.
  • Dried Cranberries: They add tart-sweet chew. Reduced-sugar varieties keep the dish from becoming too sweet.
  • Walnuts: They give crunch and a slight bitterness that balances the honey. Pecans are a good substitute.
  • Honey: It helps the topping cling and gives a glossy finish. Maple syrup works too, with a woodsier flavor.
  • Thyme: Fresh thyme gives the dish its aroma. Dried thyme can replace the leaves at one-third the amount, though the fresh sprigs on top are worth keeping.
  • Vinegar: A small splash brightens the topping and keeps the honey from tasting cloying.

Critical Steps for Crisp Edges & Perfect Texture

⚠️ Critical Step: Give the Rounds Space! Toss the rounds with oil and spices, then lay them in a single layer with space between each one. Crowded potatoes steam instead of roast, which leaves them pale and soft. Use two pans if needed.
⚠️ Critical Step: Press Gently, Only After They Are Tender! Use the bottom of a glass or a flat spatula to press each round down to about ¾ inch thick. Pressing before the potatoes are soft makes them crack and crumble. Pressing when tender creates a flattened top with crispy, rough edges.
⚠️ Critical Step: Add the Cheese for the Last Few Minutes Only! Top each round with a slice of brie and return the pan to the oven for 3 to 4 minutes, just until the cheese softens and begins to melt at the edges. Longer baking makes the brie run off the potato and pool on the pan.

Choosing the Right Sweet Potatoes

Shape matters: Long, even potatoes give uniform rounds. Very thick or very thin ones produce uneven pieces that cook at different speeds.

Color and texture: Orange-fleshed sweet potatoes such as Garnet or Jewel are moist and sweet. Japanese or white-fleshed varieties are drier and more chestnut-like, with a firmer bite that holds up well to pressing.

Size: Medium potatoes of about 8 oz each work best. Oversized ones can be halved lengthwise before slicing.

Tips for the Best Results

  • Slice evenly: Rounds of different thickness cook unevenly. Use a ruler for the first cut if needed.
  • Preheat the pan: The sizzle on contact makes a more golden crust.
  • Pat the potatoes dry after washing: Surface water slows browning.
  • Keep the brie cold until the last minute: Chilled cheese slices cleanly and holds its shape while melting.
  • Watch the honey: It scorches quickly, so cook the topping over medium heat and take it off as soon as it bubbles.
  • Use a wide spatula: It lifts the crisp bottoms without breaking them.
  • Serve soon: The bites are best within 10 to 15 minutes of leaving the oven, while the brie is soft and the edges are crisp.

Common Mistakes to Avoid

  • Crowding the pan (steams potatoes instead of roasting).
  • Cutting uneven rounds (thin pieces burn while thick pieces stay hard).
  • Pressing too early (undercooked potato cracks apart).
  • Adding the cheese too soon (brie runs off and loses structure).
  • Overcooking the topping (honey turns bitter and nuts burn).
  • Skipping the salt.
  • Using room-temperature brie (smears when sliced and melts too fast).

Variations & Adaptations

  • Goat Cheese Version: Replace brie with crumbled goat cheese for a tangier finish.
  • Blue Cheese Version: Add a small crumble of blue cheese for a bold, salty contrast.
  • Maple Pecan: Swap honey for maple syrup and walnuts for pecans.
  • Spicy-Sweet: Add a pinch of cayenne or red pepper flakes to the honey for hot honey.
  • Rosemary or Sage: Swap thyme for finely chopped rosemary or sage.
  • Add Prosciutto or Bacon: Add a crisp piece of prosciutto or bacon for a salty, savory layer.
  • Apple Topping: Mix finely diced apple into the cranberry topping for extra crunch.
  • Butternut Squash Version: Use thick rounds of peeled butternut squash instead of sweet potato.
  • Air Fryer Method: Cook rounds at 400°F (200°C) for 18 to 22 minutes, flipping halfway, then add brie for the last 2 to 3 minutes.

Dietary Notes

  • Vegetarian: Naturally vegetarian as written (check for vegetarian rennet if needed).
  • Gluten-Free: Naturally gluten-free.
  • Nut-Free: Replace walnuts with toasted pumpkin seeds or sunflower seeds.
  • Dairy-Free: Use a dairy-free soft cheese alternative and replace butter with olive oil.
  • Vegan: Use dairy-free cheese, replace honey with maple syrup, and swap butter for olive oil.
  • Lower Sugar: Reduce honey to 1 tablespoon total and choose unsweetened cranberries.

What to Serve With It

  • As an appetizer on a board with olives, nuts and sliced fruit
  • As a side with roasted chicken, turkey, pork or salmon
  • A crisp green salad with lemon vinaigrette
  • Roasted Brussels sprouts or green beans for a holiday plate
  • Drink Pairing: Sparkling wine, Chardonnay, dry rosé, or sparkling apple cider.

Make-Ahead, Storage & Reheating

Make Ahead: Roast the rounds up to a day ahead and refrigerate. Make the topping separately. Reheat rounds in a 400°F (200°C) oven for 8 to 10 minutes, add brie, and bake 3 to 4 minutes before topping.

Storing Leftovers: Refrigerate assembled bites in an airtight container for up to 3 days.

Reheating: Warm in a 375°F (190°C) oven for 8 to 10 minutes. Avoid microwaving to keep edges crisp.

Frequently Asked Questions

Why are my sweet potatoes soggy?
The pan was likely crowded, not hot enough, or the rounds were wet. Use two pans, preheat them, and dry the potatoes well.

Why did the brie melt off the potatoes?
It baked for too long. Add cheese only for the final 3 to 4 minutes of baking.

Should the brie rind stay on?
Yes, it is edible and softens nicely as it bakes. Remove only if you prefer a smoother look.

Can I use regular potatoes?
Yes, though they will be less sweet. Waxy varieties like Yukon Gold work best.

Honey Brie Roasted Sweet Potato Bites with Cranberries and Walnuts

Crispy, golden roasted sweet potato rounds topped with melted brie, warm honeyed cranberries, toasted walnuts, and fresh thyme.
Prep Time 15 minutes
Cook Time 40 minutes
Total Time 55 minutes
Servings: 6 peoples
Course: Appetizer, Side Dish
Cuisine: American, Holiday Recipes

Ingredients
  

Sweet Potatoes:
  • 2 lb 900 g medium sweet potatoes (3 to 4), scrubbed, skin on, cut into 1-inch rounds
  • 3 tbsp olive oil divided
  • 1 tsp salt
  • 1/2 tsp black pepper
  • 1/2 tsp smoked paprika (optional
Topping & Finishing:
  • 6 oz 170 g brie, chilled, cut into 12 slices
  • 1/3 cup 50 g dried cranberries
  • 1/3 cup 40 g chopped walnuts
  • 3 tbsp honey divided
  • 1 tbsp butter
  • 1 tbsp fresh thyme leaves
  • 12 small fresh thyme sprigs for garnish
  • 1 tsp balsamic or apple cider vinegar
Pinch of flaky salt

Method
 

  1. Preheat Pan: Heat oven to 425°F (220°C) with a large rimmed baking sheet inside.
  2. Oil and Season: Toss sweet potato rounds with 2 tbsp olive oil, salt, pepper, and smoked paprika until evenly coated.
  3. First Roast & Flip: Carefully place rounds flat on the hot pan in a single layer. Roast for 20 minutes. Flip and roast 10 minutes more until tender.
  4. Press & Crisp: Gently press each round to about ¾ inch thick using the bottom of a glass. Brush tops with remaining 1 tbsp olive oil and roast 8 minutes until edges are crisp and deep golden.
  5. Prepare Topping: Toast walnuts in a skillet over medium heat for 2 to 3 minutes. Add butter, cranberries, 2 tbsp honey, thyme leaves, and vinegar. Stir for 2 minutes until bubbling and glossy; remove from heat.
  6. Melt Brie: Top each round with a slice of brie and bake for 3 to 4 minutes until cheese softens and starts to melt.
  7. Assemble & Serve: Transfer to a platter, spoon warm cranberry-walnut mixture over brie, drizzle with remaining 1 tbsp honey, garnish with thyme sprigs and flaky salt, and serve warm.
Jump to Recipe

Anti-Inflammatory Recipes

Vegan Recipes

Gluten-Free Recipes

Gluten-Free

Gluten-Free Recipes

Hearty dinners and crowd-pleasing appetizers made without wheat-based ingredients. Click any recipe for the full step-by-step guide.

Classic Mediterranean Recipes

Dairy-free Recipes

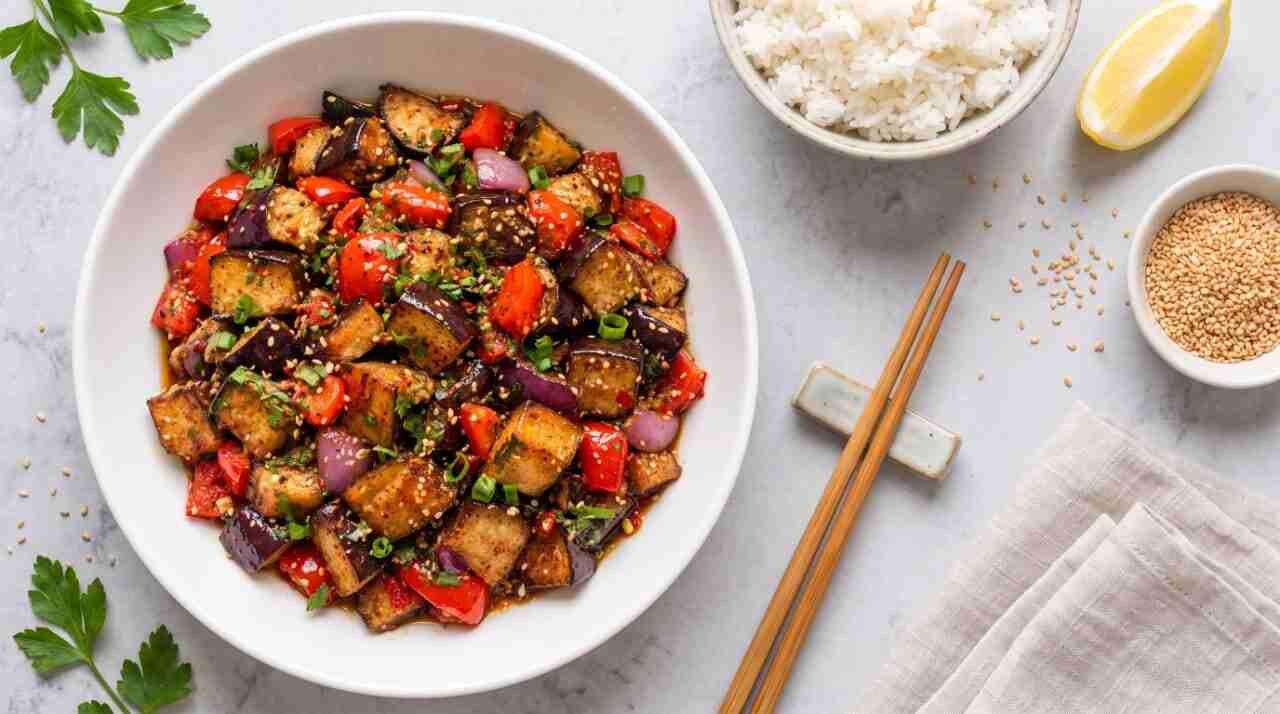
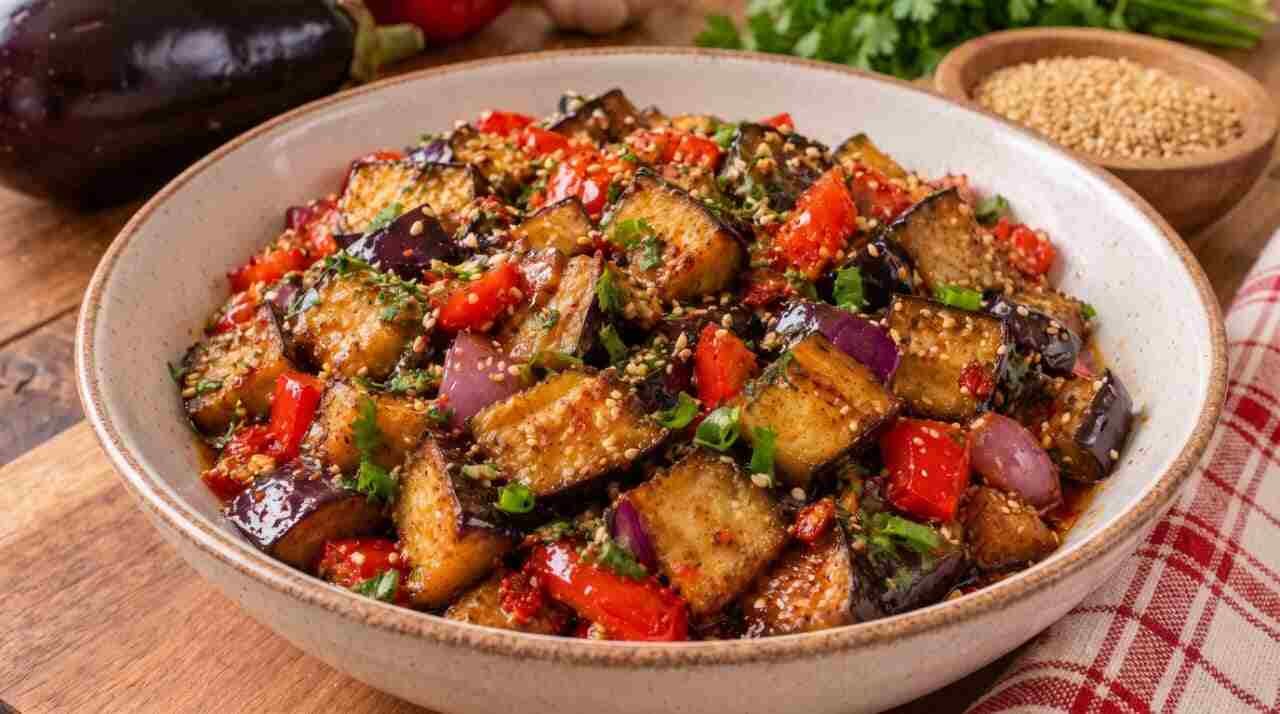
Crispy Sesame Eggplant with Red Peppers and Garlic Glaze

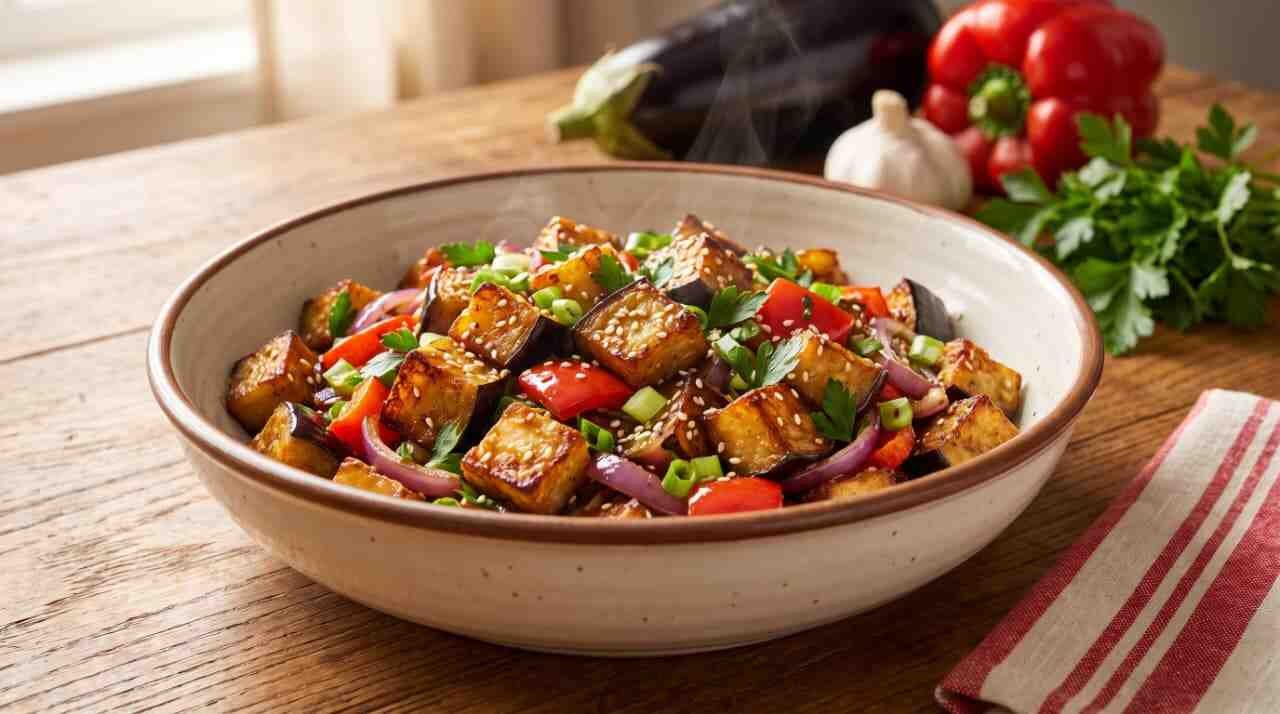
Eggplant has a reputation for turning out oily, gray or mushy. This recipe avoids all three. The cubes are roasted at high heat until the edges turn golden and crisp, then tossed with sweet red pepper, red onion and a glossy garlic-soy glaze, and finished with toasted sesame seeds, scallions and fresh herbs.

The result is tender inside, crisp outside, and full of savory, sweet and tangy flavor with a nutty sesame finish. It works as a side dish, a main with rice or grains, a topping for flatbread, or a cold salad for lunch the next day. It also uses everyday ingredients and takes about 45 minutes, most of it hands-off oven time.

This guide covers choosing and cutting eggplant, the method that keeps it crisp, the glaze, swaps for different diets, serving ideas, storage, and answers to common questions.

Why This Recipe Works

  • High heat gives crisp edges: A 425°F oven browns the eggplant quickly, so it caramelizes before it turns soft and soggy.
  • Roasting uses less oil than frying: Eggplant absorbs oil like a sponge, so a measured amount on a sheet pan keeps it light.
  • The glaze goes on at the end: Adding the sauce after roasting keeps the cubes crisp instead of steaming them.
  • Sweet, salty and tangy stay balanced: Honey, soy sauce and rice vinegar keep any one flavor from taking over.
  • It is flexible: It can be vegan, gluten-free, spicier or served hot, warm or cold.

Ingredient Notes

  • Eggplant: Choose firm eggplants that feel heavy for their size, with smooth, glossy skin. Large globe eggplants work well, and so do Italian or Chinese varieties, which have thinner skin and fewer seeds. Leave the skin on. It holds the cubes together and adds color.
  • Oil: Olive oil is classic. Avocado oil handles high heat well and has a neutral taste. Do not add extra oil beyond the amount listed, since eggplant will keep absorbing it.
  • Bell Pepper: Red peppers are sweeter than green and give the dish its color. Yellow or orange work too.
  • Red Onion: It softens and sweetens in the oven and adds a bit of color contrast. Yellow onion is a fine substitute.
  • Soy Sauce: Low-sodium lets you control the salt. Tamari makes the dish gluten-free. Coconut aminos is a milder, sweeter option.
  • Honey: It helps the glaze cling and gives a glossy finish. Maple syrup or agave works for a vegan version.
  • Rice Vinegar and Lemon: Acid brightens the dish and cuts through the richness of the sesame oil. Either one works.
  • Toasted Sesame Oil: A strong flavor, so a tablespoon is enough. It is used as a finishing flavor in the glaze, not for cooking at high heat.
  • Sesame Seeds: Toasting brings out their nutty flavor. White seeds are standard, and a mix of black and white looks striking.
  • Fresh Herbs: Parsley gives a clean, green taste. Cilantro gives a more Asian-leaning flavor. Both are good.

Critical Steps for Maximum Crispness

⚠️ Critical Step: Don’t Overcrowd the Pan! Spread the eggplant in a single layer with space between the cubes, using two pans if needed. Crowded eggplant steams instead of roasting, which gives gray, soggy cubes. Space is what creates crisp edges.
⚠️ Critical Step: Add the Peppers and Onion Midway! Peppers and onion cook faster than eggplant. Adding them after the first 12 minutes keeps them tender with caramelized edges instead of limp and burnt. Everything finishes at the same time.
⚠️ Critical Step: Toss While Hot, Then Serve Quickly! Add the hot roasted vegetables to the glaze while they are still warm so they absorb the flavor, and toss gently to avoid breaking the cubes. Serve soon after. Long sitting in the glaze softens the crisp edges.

How to Get Eggplant Crisp Instead of Soggy

  • Dry the cubes: Wet eggplant steams instead of roasting.
  • Use a hot pan: Preheating the baking sheet speeds up browning.
  • Use enough space: Arrange in one layer, not a pile.
  • Don’t stir too early: Leave it undisturbed for the first 12 minutes to build a crust.
  • Measure the oil: Too little leads to dry, tough cubes, and too much makes them greasy.
  • Glaze last: Adding sauce on raw or half-cooked eggplant makes it soft.

Choosing and Cutting Eggplant

Selection: The skin should be tight and shiny, the stem green and fresh, and the eggplant heavy for its size. Avoid soft spots, wrinkles or brown patches.

Cutting: Trim the stem and cut the eggplant into even ¾-inch cubes. Small cubes burn, and large ones stay raw in the center. Cubes of the same size cook at the same speed.

Tips for the Best Results

  • Use a metal baking sheet: Dark or heavy metal pans brown better than glass, which holds heat unevenly.
  • Line pans with parchment only if needed: Parchment prevents sticking but slightly reduces browning. A well-oiled hot pan gives the best crust.
  • Taste the glaze: Dip a piece of roasted eggplant in it and adjust the salt, acid or sweetness before tossing everything together.
  • Grate the ginger finely: Large bits of raw ginger can taste sharp.
  • Add the herbs at the end: Heat dulls their color and aroma.
  • Use a wide spatula: It lifts the browned cubes without breaking them.

Common Mistakes to Avoid

  • Overcrowding the pan (steams the eggplant into a soft, gray mass).
  • Skipping the drying step after salting.
  • Adding all vegetables at once.
  • Over-oiling the eggplant.
  • Saucing too early.
  • Using large chunks that stay dense inside.
  • Burning the sesame seeds.
  • Over-salting without tasting the soy sauce first.

Variations & Adaptations

  • Spicy Version: Add 1 to 2 teaspoons of chili garlic sauce or sriracha to the glaze.
  • Miso Glaze: Replace soy sauce with 1 tablespoon of white miso whisked with a little warm water for a deeper savory taste.
  • Mediterranean Style: Swap glaze for lemon juice, olive oil, minced garlic, cumin, parsley, mint, and crumbled feta.
  • Add Chickpeas: Roast 1 can of drained, dried chickpeas on the pan with the vegetables for protein.
  • Add Tofu: Cube firm, pressed tofu and roast it on a third pan, then toss everything together.
  • Sweet and Tangy: Add 1 tablespoon of pomegranate molasses to the glaze.
  • With Zucchini: Replace one eggplant with 2 cups of diced zucchini and add it with the peppers.
  • Air Fryer Version: Cook eggplant in batches at 400°F (200°C) for 12 to 14 minutes, shaking halfway, then toss with glaze.

Dietary Notes

  • Vegan: Use maple syrup or agave instead of honey.
  • Gluten-Free: Use tamari or coconut aminos instead of soy sauce.
  • Nut-Free: The recipe is naturally nut-free. (If sesame-allergic, omit seeds and sesame oil, using olive oil in glaze).
  • Lower Sodium: Use low-sodium soy sauce, reduce to 1 tablespoon, and add more lemon juice.
  • Low Sugar: Cut honey to 1 teaspoon or leave it out.

What to Serve With It

  • Steamed rice, brown rice or quinoa
  • Noodles, such as soba or rice noodles
  • Grilled chicken, salmon or shrimp for protein
  • Warm flatbread or pita for scooping
  • A crisp cucumber salad with rice vinegar
  • A fried or soft-boiled egg on top
  • Yogurt with garlic and lemon as a cool contrast
  • Drink Pairing: Iced green tea, sparkling water with lime, or a dry Riesling.

Make-Ahead, Storage & Reheating

Make Ahead: Mix the glaze up to 3 days in advance. Cut vegetables a day ahead and refrigerate. Roast and toss right before serving for maximum crispness.

Storing Leftovers: Refrigerate in an airtight container for up to 4 days. The cubes soften in storage, but the flavor deepens.

Reheating: Warm in a 400°F (200°C) oven for 8 to 10 minutes to bring back crispness, or use a hot skillet.

Serving Cold: Leftovers make an excellent cold salad with a fresh squeeze of lemon and fresh herbs.

Frequently Asked Questions

Do I have to salt the eggplant?
Not always. Salting helps with bitterness and moisture in large or older eggplants. Fresh, small eggplants or Chinese/Japanese varieties are fine without it.

Why is my eggplant soggy?
The pan was likely crowded, the oven wasn’t hot enough, or the cubes were wet. Use two pans, preheat them, and dry the eggplant well.

Can I use an air fryer?
Yes! Cook in small batches at 400°F (200°C) for 12 to 14 minutes, shaking the basket halfway through.

Is this dish vegan?
It can be! Simply swap the honey for maple syrup or agave nectar.

Crispy Sesame Eggplant with Red Peppers and Garlic Glaze

Tender roasted eggplant cubes with crisp edges, tossed with sweet red bell peppers, red onion, and a glossy garlic-soy sesame glaze.
Prep Time 15 minutes
Cook Time 30 minutes
Total Time 45 minutes
Servings: 4 people
Course: Main Course, Side Dish
Cuisine: Asian-Inspired, Vegetarian

Ingredients
  

Vegetables:
  • 2 large eggplants about 2 lb / 900 g, cut into ¾-inch cubes
  • 3 tbsp olive oil or avocado oil
  • 1/2 tsp salt
  • 2 red bell peppers cut into 1-inch pieces
  • 1 medium red onion cut into thin wedges
Garlic-Soy Glaze:
  • 2 tbsp low-sodium soy sauce
  • 1 tbsp honey or maple syrup
  • 1 tbsp rice vinegar or fresh lemon juice
  • 1 tbsp toasted sesame oil
  • 3 garlic cloves minced
  • 1 tsp freshly grated ginger
  • 1/4 tsp red pepper flakes optional
To Finish:
  • 2 tbsp sesame seeds toasted
  • 2 scallions thinly sliced
  • 2 tbsp chopped fresh parsley or cilantro
  • Lemon wedges for serving

Method
 

  1. Preheat Pans: Heat oven to 425°F (220°C) with two large rimmed baking sheets inside.
  2. Season Eggplant: Toss dry eggplant cubes with 3 tbsp oil and 1/2 tsp salt until evenly coated.
  3. First Roast: Carefully remove hot baking sheets from oven. Spread eggplant in a single layer across both pans. Roast undisturbed for 12 minutes until edges start browning.
  4. Add Peppers & Onion: Remove pans, flip eggplant, and scatter red peppers and red onion across both pans. Roast 12 to 15 minutes more until deep golden and crisp.
  5. Make Glaze: Whisk soy sauce, honey, rice vinegar, sesame oil, garlic, ginger, and red pepper flakes in a large bowl until honey dissolves.
  6. Toast Sesame Seeds: Toast sesame seeds in a dry skillet over medium heat for 2 to 3 minutes until golden.
  7. Toss & Serve: Add hot roasted vegetables directly to the glaze bowl and toss gently. Transfer to a platter, top with toasted sesame seeds, scallions, fresh herbs, and serve with lemon wedges.
Jump to Recipe

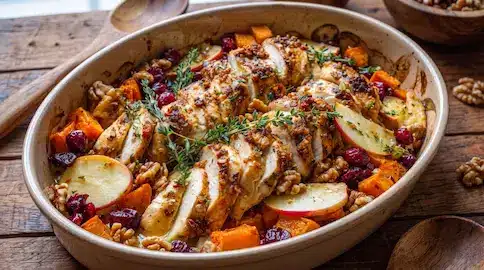
Harvest Roasted Chicken with Butternut Squash, Apples and Cranberries

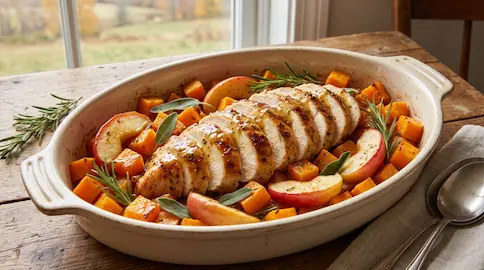
Autumn flavors work well together: sweet roasted squash, crisp apple, tart cranberries, toasted walnuts and woody thyme. This dish puts them all in one baking dish with juicy chicken breast, so the fruit and vegetables cook in the same pan juices and a honey-Dijon garlic butter ties everything together.

The result is a golden, glossy tray of sliced chicken, caramelized squash and soft apple, with chewy cranberries and crunchy walnuts in every bite. It looks like a holiday centerpiece but takes under an hour, with most of that time spent in the oven. It works for a weeknight dinner, a Sunday meal, or a smaller Thanksgiving or Friendsgiving table.

This guide covers choosing the chicken and squash, the full method, the order that keeps each ingredient from overcooking, swaps for different diets, serving ideas, storage and answers to common questions.

Why This Recipe Works

  • Everything cooks in one dish: Chicken, squash, apple, cranberries and walnuts share a single baking dish, so cleanup is minimal.
  • Staged cooking prevents overcooking: Squash needs the longest, chicken is next, and the apples, cranberries and walnuts need only the last few minutes. Staging them prevents mushy fruit and burnt nuts.
  • The glaze does double duty: Honey, Dijon, garlic and thyme coat the chicken and drip into the pan, where they flavor the squash and make a light sauce.
  • Sweet and savory stay balanced: Mustard, salt, thyme and a splash of vinegar keep the dish from tasting like dessert.
  • It is a full meal: Protein, vegetables, fruit and nuts are all in one dish.

Ingredient Notes

  • Chicken Breasts: Even thickness matters more than size. Breasts that taper to a thin end dry out before the thick part cooks through, so pound the thick end to about ¾ inch. Chicken thighs also work and are more forgiving, though they need a few extra minutes.
  • Butternut Squash: A whole squash gives the best flavor. Pre-cut squash saves time and works fine. Keep the cubes at about ¾ inch so they soften at the same pace as the chicken.
  • Apples: Choose a firm, slightly tart variety such as Honeycrisp, Granny Smith or Pink Lady. Soft apples like Red Delicious fall apart in the oven. Leave the skin on for color and structure.
  • Dried Cranberries: They add tartness and chew. Unsweetened or reduced-sugar varieties keep the dish from getting too sweet.
  • Walnuts: They add crunch and a slight bitterness that balances the honey. Pecans are a good substitute.
  • Honey and Dijon: The honey caramelizes at the edges, and the mustard keeps the glaze savory and helps it cling to the chicken.
  • Thyme: Fresh thyme gives the dish its woodsy aroma. Dried thyme can replace the leaves at one-third the amount, but fresh sprigs on top look better.
  • Apple Cider Vinegar: A small amount brightens the glaze and keeps the sweetness in check.

Critical Timing & Technique Steps

⚠️ Critical Step: Pound the Chicken to an Even Thickness! Place each breast between two sheets of parchment or plastic wrap and gently pound the thick end until the whole piece is about ¾ inch thick. Uneven chicken cooks unevenly, leaving the thin end dry and the thick end undercooked.
⚠️ Critical Step: Roast the Squash First, Then Add the Chicken! Squash needs longer than chicken to turn tender and caramelize. Giving it a 12-minute head start means everything finishes together. Adding all the ingredients at once leaves the squash hard or the chicken dry.
⚠️ Critical Step: Add the Apples, Cranberries and Walnuts Late! Toss the apple wedges with lemon juice, then scatter them around the chicken together with the cranberries and walnuts for the last 8 to 10 minutes only. Added at the start, apples turn to mush, cranberries harden, and walnuts burn.
⚠️ Critical Step: Rest Before Slicing! Let the dish sit for 5 to 8 minutes before cutting the chicken. The juices settle back into the meat during this time. Slicing immediately lets them run out onto the pan, leaving the chicken drier.

Choosing the Right Produce

Squash Options

Butternut is the classic choice because it is sweet, dense and easy to cut. Other great options include:

  • Kabocha: Sweeter and drier, with an edible skin that needs no peeling.
  • Acorn Squash: Cut into wedges with the skin on. It is slightly less sweet and needs a few extra minutes.
  • Sweet Potato: A good swap that roasts at about the same rate.
  • Delicata: Thin, edible skin and a creamy texture, sliced into half-moons.

Apple Varieties

Choose firm apples that hold their shape in a hot oven: Honeycrisp, Granny Smith, Pink Lady, Braeburn, or Jonagold. Avoid mealy or soft apples like Red Delicious, which turn to sauce in the pan.

Tips for the Best Results

  • Use a large enough dish: Crowded pans steam instead of roast. The squash needs room to touch the hot surface and brown.
  • Cut the squash evenly: Uniform cubes soften at the same time. Small pieces burn while large ones stay hard.
  • Check the chicken with a thermometer: An instant-read thermometer is more reliable than color or time. Pull the chicken at 165°F (74°C).
  • Don’t skip the vinegar: A tablespoon seems small, but it keeps the glaze from tasting flat and overly sweet.
  • Keep walnuts under watch: Ovens vary, and walnuts can go from toasted to bitter quickly. If they brown too fast, cover them with the fruit or add them for the last 5 minutes.
  • Use the pan juices: The drippings are a built-in sauce. Spoon them over each plate and over any rice or grains served with the dish.
  • Broil for color if needed: If the chicken is cooked but pale, switch to broil for 1 to 2 minutes and watch closely.

Common Mistakes to Avoid

  • Skipping the pounding step (leads to dry edges and undercooked centers).
  • Putting everything in at once instead of staging items.
  • Crowding the dish (causes steaming instead of caramelization).
  • Cutting the chicken straight out of the oven.
  • Using soft, mealy apples.
  • Skipping salt in sweet/savory glazes.
  • Overbaking past 165°F.

Variations & Adaptations

  • Thighs instead of breasts: Use 8 boneless, skinless thighs (no pounding needed). Bake until they reach 175°F (80°C) for the best texture (add 5 to 8 minutes).
  • Maple instead of honey: Replace honey with pure maple syrup for a deeper, woodsier sweetness.
  • Pecans instead of walnuts: Pecans taste sweeter and buttery.
  • Add Brussels Sprouts: Halve 1 cup of sprouts and add them with the squash.
  • Add Red Onion: Cut 1 red onion into wedges and roast with the squash.
  • Rosemary or Sage: Swap thyme for chopped rosemary or sage for a heartier flavor.
  • Make it Spicy: Add ¼ teaspoon red pepper flakes or cayenne to the glaze.
  • Add Goat Cheese: Crumble over the finished dish for a creamy, tangy contrast.

Dietary Notes

  • Gluten-Free: Naturally gluten-free. Verify broth and Dijon labels.
  • Dairy-Free: Replace butter with extra olive oil or ghee.
  • Lower Sugar: Reduce honey to 1 tablespoon and use unsweetened cranberries.
  • Nut-Free: Replace walnuts with roasted pumpkin seeds or sunflower seeds.
  • Paleo / Whole30: Use maple syrup or omit sweetener, ensure compliant Dijon/cranberries, and use ghee.

What to Serve With It

  • Fluffy rice, quinoa or farro to soak up the pan juices
  • A green salad with lemon vinaigrette
  • Steamed or roasted green beans for extra color
  • Crusty bread for the sauce
  • Mashed potatoes for a holiday-style meal
  • Garlicky sautéed kale or spinach
  • Drink Pairing: Dry white wine like Chardonnay or Pinot Gris, or sparkling apple cider.

Make-Ahead, Storage & Reheating

Make Ahead: Cube squash, cut apples, make glaze, and pound chicken up to 1 day ahead. Store separately in the fridge (toss apples in lemon juice to prevent browning). Assemble and bake when ready.

Storing Leftovers: Cool and store in an airtight container in the fridge for up to 4 days.

Reheating: Warm in a 350°F (175°C) oven covered loosely with foil for 12 to 15 minutes. Add a splash of broth to keep chicken moist.

Freezing: Freeze cooked chicken and squash for up to 2 months (apples turn soft when thawed, so freeze without apples if possible).

Frequently Asked Questions

What temperature should chicken breast reach?
165°F (74°C) at the thickest part measured with an instant-read thermometer.

Why is my chicken dry?
Usually caused by uneven thickness, overbaking, or slicing without resting. Always pound to even thickness and rest 5-8 minutes.

Can I use frozen butternut squash?
Yes, but thaw and pat dry first. It releases more water and browns slightly less.

Can I make this on a sheet pan instead?
Yes! A rimmed sheet pan gives more browning but less pan sauce. Add extra broth if the pan looks dry.

Why did my walnuts burn?
They were exposed to direct heat too long. Add them only during the final 8–10 minutes of baking.

Harvest Roasted Chicken with Butternut Squash, Apples and Cranberries

A golden, glossy one-pan fall dish featuring juicy chicken breasts, caramelized butternut squash, soft apples, dried cranberries, and toasted walnuts with a honey-Dijon garlic butter glaze.
Prep Time 20 minutes
Cook Time 37 minutes
Total Time 57 minutes
Servings: 4 people
Course: Dinner, Main Course
Cuisine: American, Fall Recipes

Ingredients
  

Chicken & Seasoning:
  • 4 boneless skinless chicken breasts (6 to 7 oz each)
  • 1 tsp salt
  • 1/2 tsp black pepper
  • 1/2 tsp garlic powder
  • 1/2 tsp paprika
Squash Base:
  • 3 cups about 1 lb / 450 g butternut squash, peeled and cut into ¾-inch cubes
  • 1 tbsp olive oil
  • 1/2 tsp salt
  • 1/4 tsp ground cinnamon optional
Honey-Dijon Garlic Butter Glaze:
  • 3 tbsp unsalted butter melted
  • 2 tbsp olive oil
  • 2 tbsp honey
  • 1 tbsp Dijon mustard
  • 4 garlic cloves minced
  • 1 tbsp fresh thyme leaves plus 4 to 5 whole sprigs for the pan
  • 1 tbsp apple cider vinegar
Fruit, Nuts & Pan Liquid:
  • 2 medium firm apples Honeycrisp or Granny Smith, cored and cut into ½-inch wedges
  • 1 tsp lemon juice
  • 1/2 cup 60 g dried cranberries
  • 1/2 cup 55 g walnut halves
  • 1/4 cup 60 ml chicken broth

Method
 

  1. Preheat & Roast Squash: Heat oven to 425°F (220°C). Toss butternut squash cubes with 1 tbsp olive oil, 1/2 tsp salt, and cinnamon in a large rimmed baking dish or sheet pan. Roast for 12 minutes.
  2. Pound & Season Chicken: Pound thick ends of chicken breasts to an even ¾-inch thickness. Pat dry. Mix 1 tsp salt, black pepper, garlic powder, and paprika; season both sides of chicken.
  3. Whisk Glaze: Whisk melted butter, 2 tbsp olive oil, honey, Dijon, garlic, thyme leaves, and apple cider vinegar until smooth. Reserve 2 tablespoons for finishing.
  4. Assemble Chicken & Squash: Remove dish from oven. Push squash to edges, place chicken in center, and spoon glaze over chicken. Pour chicken broth into empty spaces and add thyme sprigs.
  5. Roast Chicken: Return to oven and roast for 15 minutes.
  6. Add Fruit & Nuts: Toss apple wedges in lemon juice. Scatter apples, cranberries, and walnuts around the chicken. Roast 8 to 10 minutes more until chicken internal temperature reaches 165°F (74°C) and squash is fork-tender.
  7. Rest & Serve: Rest dish for 5 to 8 minutes. Slice chicken, brush with reserved glaze, spoon pan juices over top, and serve warm.
Jump to Recipe

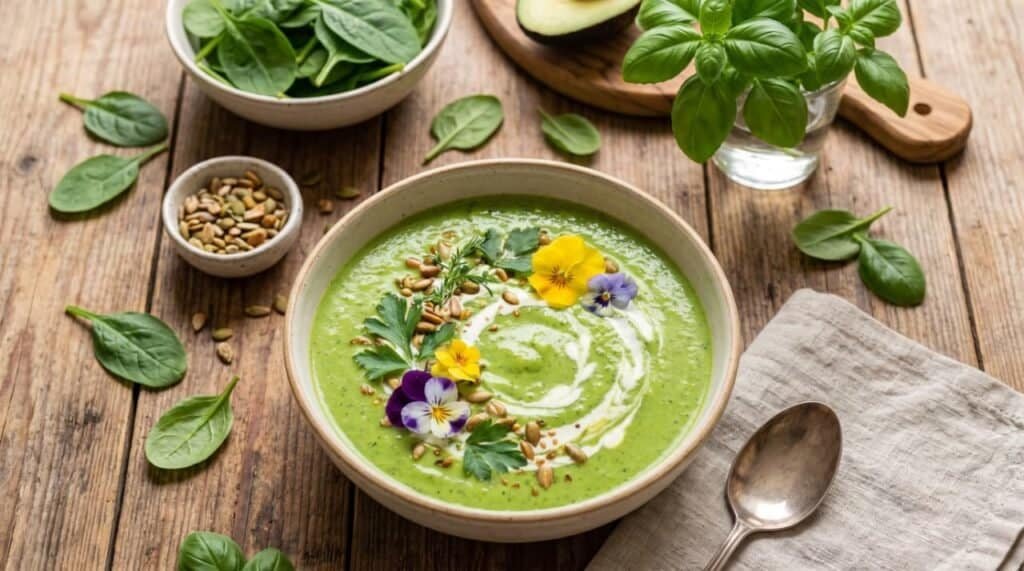
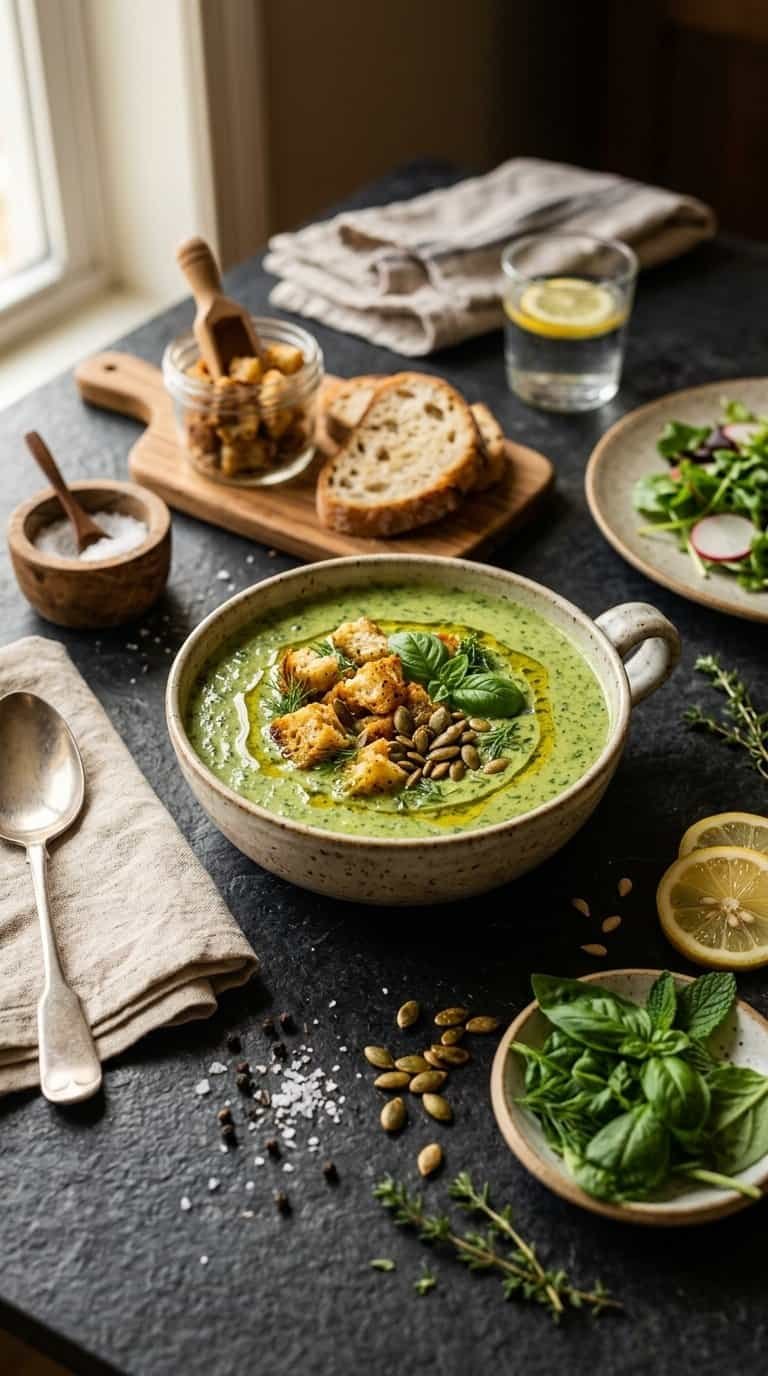
Green Goddess Soup with Spinach, Fresh Herbs and Lemon

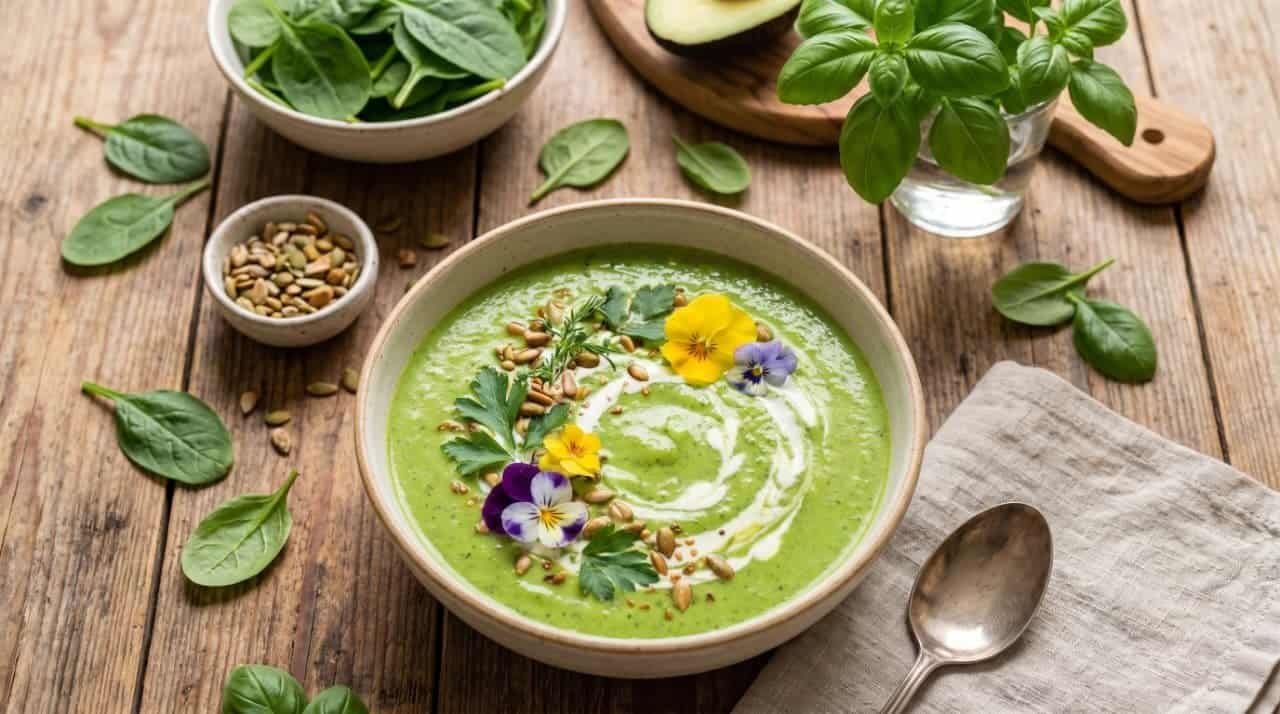
The original Green Goddess dressing was created in San Francisco in the 1920s, and its blend of fresh herbs, lemon and creamy tang has stayed popular ever since. This soup takes that flavor and serves it warm. Spinach gives it color and body, a handful of soft herbs gives it a garden-fresh taste, a small potato makes it silky, and lemon keeps every spoonful bright.

The result is a vivid green soup that tastes clean, herby and lightly tangy. It is topped with a spoonful of yogurt, crunchy croutons, toasted pumpkin seeds and a swirl of olive oil. It suits a light lunch, a starter, or an easy dinner with toasted bread, and it takes about 40 minutes from start to finish.

Below you will find the ingredient list, how to choose herbs, a clear step-by-step method, ways to keep the color bright, topping ideas, diet swaps, storage advice and answers to common questions.

Why This Soup Works

  • Herbs do the heavy lifting: A full cup of fresh herbs goes into the blender, so the flavor is bold and fresh rather than faint.
  • Creaminess comes from the potato: Blended potato adds body without any heavy cream.
  • Lemon juice and zest add lift: The soup tastes bright instead of flat or heavy.
  • Short cooking keeps the color: The spinach cooks for a minute and the herbs are never simmered.
  • Easy to adapt: Vegan, dairy-free, gluten-free and richer versions are all covered below.

Ingredient Guide

  • Spinach: Baby spinach is mild and tender, so it blends into a smooth soup. If using mature spinach, remove the thick stems first.
  • Herbs: A mix tastes best. Parsley adds freshness, basil adds sweetness, and chives add a mild onion note. Dill and tarragon give a classic Green Goddess character but are strong, so use them in small amounts. Use tender leaves and thin stems, and leave out woody stems.
  • Potato: Russet or Yukon Gold works best. It supplies the creamy texture, so avoid skipping it.
  • Broth: Low-sodium vegetable broth gives control over the salt. Chicken broth works if the soup does not need to be vegetarian.
  • Yogurt: Plain Greek yogurt adds tang and richness. Full-fat or 2% gives the creamiest result.
  • Lemon: Fresh juice and fresh zest are important. Bottled juice tastes flatter and has none of the zest’s aroma.
  • Bread: A sturdy, slightly stale loaf such as sourdough or ciabatta stays crisp. Soft sandwich bread turns soggy.

Critical Steps for Bright Color & Safety

⚠️ Critical Step: Cook the Spinach for One Minute Only! Stir in the spinach and cook for about 1 minute, just until it collapses. Longer cooking turns the soup from bright green to dull olive and weakens the fresh taste. Remove the pot from the heat as soon as the leaves have wilted.
⚠️ Critical Step: Add the Herbs Raw! Take the pot off the heat and add the fresh herbs right before blending. Simmering mutes both their color and their aroma. Adding them at the end is what gives the soup its Green Goddess flavor instead of tasting like plain spinach soup.
⚠️ Critical Step: Blend Hot Soup Safely! Steam expands quickly in a sealed blender and can force the lid off, causing burns. Fill the blender no more than halfway, remove the center cap from the lid, and cover the opening with a folded towel while holding the lid down. Start on low speed and blend in batches. An immersion blender used directly in the pot avoids this problem.

Keeping the Soup Bright Green

  • Wilt the spinach briefly — heat breaks down chlorophyll, which dulls the color.
  • Add herbs raw — they contribute bright color as well as fresh flavor.
  • Do not brown the onion — soften it gently to avoid darkening the broth.
  • Add the lemon at the end — acid added early can push the green toward an olive tone.
  • Serve soon after blending — the color is best fresh and slowly darkens over a few days.
  • Use plenty of spinach — it deepens the green without overpowering the taste.

Tips for Better Flavor and Texture

  • Season at the end: Blended soups need more salt and lemon than expected, so taste right before serving.
  • Blend longer than seems necessary: A long, thorough blend produces the silkiest texture.
  • Strain if desired: Pushing the soup through a fine sieve removes any stray fibers for a restaurant finish.
  • Cut the potato evenly: Even cubes cook at the same rate, so none stay hard.
  • Keep warm broth nearby: The soup thickens as it cools and may need loosening.
  • Dry the herbs after washing: Wet herbs can thin the soup out unnecessarily.

Common Mistakes to Avoid

  • Overcooking the spinach (top cause of dull color and flat taste).
  • Simmering the herbs (mutes their flavor and color).
  • Leaving out the potato (soup turns out thin and less creamy).
  • Adding yogurt while the soup is boiling (causes it to curdle/turn grainy).
  • Overfilling the blender with hot liquid.
  • Under-seasoning with salt, pepper, or lemon juice.
  • Adding soggy or un-toasted croutons too early.

Topping Ideas

  • Crispy roasted chickpeas for protein.
  • Crumbled feta or goat cheese for salty tang.
  • Crisp bacon or pancetta bits for a smoky note.
  • Extra chives, dill, or microgreens.
  • Chili oil for gentle heat.
  • A soft-boiled egg for a more filling meal.
  • Toasted almonds or sunflower seeds instead of pumpkin seeds.
  • Sliced avocado for extra creaminess.

Variations Worth Trying

  • Vegan and Dairy-Free: Replace the yogurt with unsweetened coconut yogurt or a splash of coconut milk.
  • Gluten-Free: Use gluten-free bread for the croutons, or leave them out and add extra seeds. Check that the broth is gluten-free.
  • Creamy Avocado Version: Blend in half a ripe avocado for richness. Serve soon, since avocado darkens over time.
  • With Peas: Add 1 cup of frozen peas with the spinach for extra sweetness and protein.
  • Higher Protein: Blend in a cup of cannellini beans, or top with shredded chicken.
  • Spicy: Add a pinch of red pepper flakes or a small chopped chili with the onion.
  • With Kale: Replace half the spinach with kale, remove the stems, and cook a few minutes longer.
  • Lighter Version: Skip the croutons, halve the oil, and top simply with yogurt and herbs.

What to Serve With It

  • Toasted crusty bread with butter or olive oil.
  • A grilled cheese sandwich for a cozy lunch.
  • A simple green salad with lemon vinaigrette.
  • Roasted vegetables.
  • A soft-boiled egg or a slice of prosciutto for a heartier meal.
  • Drink Pairing: Crisp white wine like Sauvignon Blanc or sparkling water with lemon.

Make-Ahead, Storage and Reheating

Make Ahead: Cook, blend and cool the soup up to 2 days ahead, without the yogurt. Stir in the yogurt and a fresh squeeze of lemon when reheating.

Refrigerator: Store in an airtight container for up to 4 days. Keep croutons separate at room temperature so they stay crisp.

Reheating: Warm gently over medium-low heat, stirring often. Avoid hard boiling, especially once the yogurt is in. Add a splash of broth if the soup has thickened.

Freezer: Freeze without the yogurt for up to 3 months. Thaw overnight in the refrigerator, reheat gently, and stir in fresh yogurt and lemon. The color may be slightly duller, but the flavor stays good.

Frequently Asked Questions

What does “green goddess” mean in this soup?
It refers to the flavor profile of the classic dressing: fresh herbs, lemon and a creamy, tangy base applied in a warm soup form.

Which herbs work best?
Parsley, basil and chives make a reliable base. Dill and tarragon add a classic note but should be used sparingly.

Why did the soup turn dull green?
The spinach was probably overcooked, or the herbs were simmered. Cook spinach for only 1 minute and add herbs off the heat.

Can dried herbs be used?
It is not recommended. Fresh herbs are essential for both color and flavor.

Is the potato necessary?
It is not strictly required, but it provides the creamy body without needing heavy cream.

Can it be made without a blender?
An immersion blender is the easiest option. A food processor works in batches, though the soup may be slightly less smooth.

Why did the yogurt curdle?
The soup was too hot. Take it off the heat and let it settle for a minute before stirring in the yogurt.

Can it be served cold?
Yes. Chill it for a few hours and add a little extra lemon, since cold mutes flavor slightly.

Green Goddess Soup with Spinach, Fresh Herbs and Lemon

A vivid, silky green soup packed with spinach, soft herbs, potatoes, and lemon, topped with Greek yogurt, crunchy croutons, and toasted pumpkin seeds.
Prep Time 15 minutes
Cook Time 25 minutes
Total Time 40 minutes
Servings: 4 peoples
Course: Main Course, Soup
Cuisine: American, healthy

Ingredients
  

For the Soup:
  • 2 tbsp olive oil
  • 1 medium yellow onion or 1 large leek white and light green parts, chopped
  • 2 garlic cloves minced
  • 1 medium potato about 7 oz / 200 g, peeled and cut into ½-inch cubes
  • 4 cups 950 ml vegetable broth
  • 6 packed cups 180 g baby spinach
  • 1 packed cup about 30 g soft fresh herbs (parsley, basil, chives, optional dill/tarragon)
  • 1/2 cup 120 g plain Greek yogurt
  • 1 tbsp fresh lemon juice
  • Zest of 1/2 lemon
  • 1/2 tsp salt plus more to taste
  • 1/4 tsp black pepper
For the Croutons:
  • 2 thick slices crusty bread cut into ¾-inch cubes
  • 1 tbsp olive oil
Pinch of salt
For Finishing:
  • 2 tbsp pumpkin seeds toasted
  • 4 tbsp plain Greek yogurt
Extra virgin olive oil, for drizzling
Freshly ground black pepper

Method
 

  1. Bake Croutons: Heat oven to 400°F (200°C). Toss bread cubes with 1 tbsp olive oil and a pinch of salt. Spread on a baking sheet and bake for 8 to 10 minutes until golden and crisp.
  2. Toast Pumpkin Seeds: Toast pumpkin seeds in a dry skillet over medium heat for 2 to 3 minutes, shaking often, until puffed. Move to a plate.
  3. Soften Onion: Heat 2 tbsp olive oil in a large pot over medium heat. Add onion or leek with a pinch of salt. Cook 5 to 6 minutes until soft and translucent (do not brown).
  4. Add Garlic: Stir in minced garlic and cook for 1 minute until fragrant.
  5. Simmer Potato: Add diced potato and vegetable broth. Bring to a boil, lower heat, and simmer partly covered for 12 to 15 minutes until potato is completely tender.
  6. Wilt Spinach: Stir in spinach and cook for 1 minute only, just until wilted. Immediately remove pot from heat.
  7. Add Herbs & Blend: Add raw herbs to the pot off the heat. Blend using an immersion blender (or in careful batches in a standard blender) until completely smooth and glossy.
  8. Finish Sauce: Let soup settle for 1 minute. Stir in 1/2 cup yogurt, lemon juice, and lemon zest. Season with salt and pepper to taste.
  9. Serve: Ladle into warm bowls. Top each with a spoonful of yogurt, croutons, toasted pumpkin seeds, a swirl of extra virgin olive oil, and fresh black pepper.
Jump to Recipe

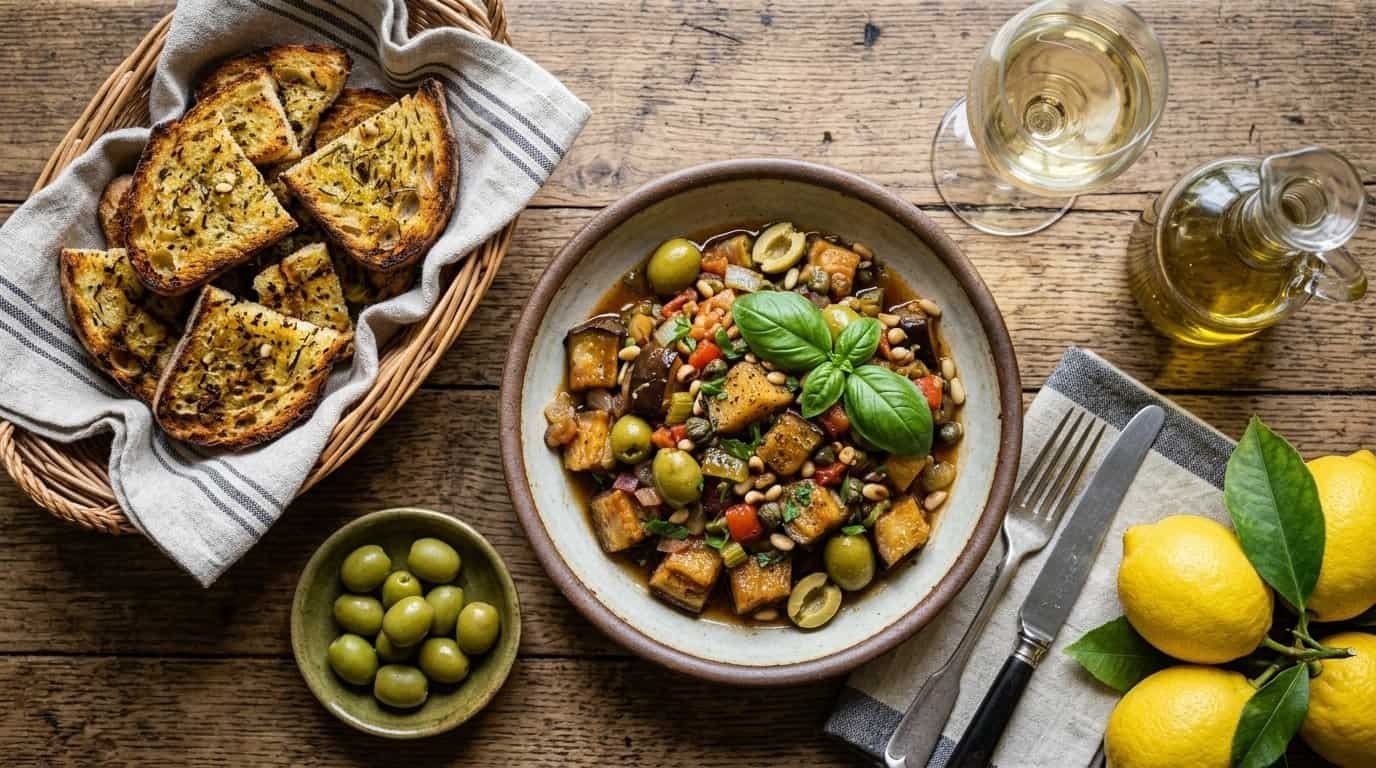
Sicilian Caponata (Sweet and Sour Eggplant Stew)

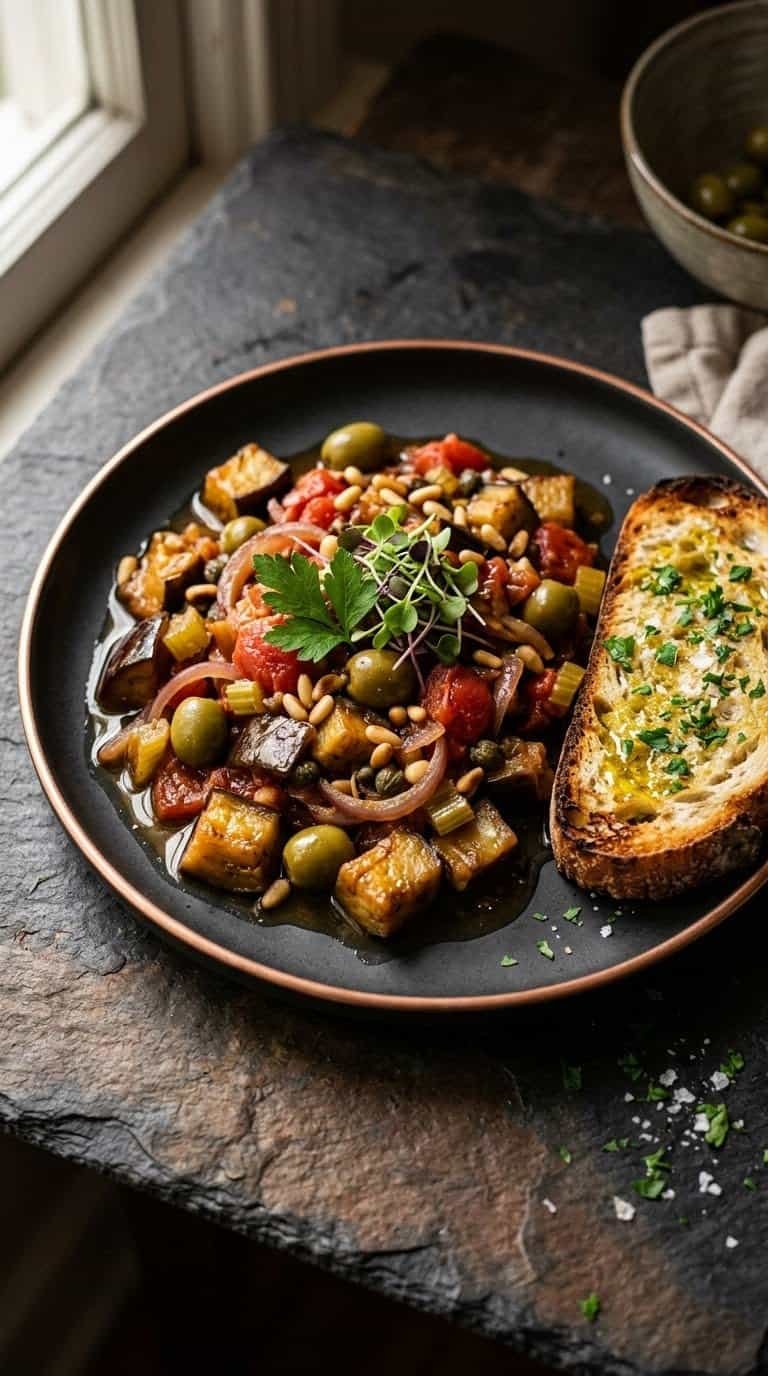
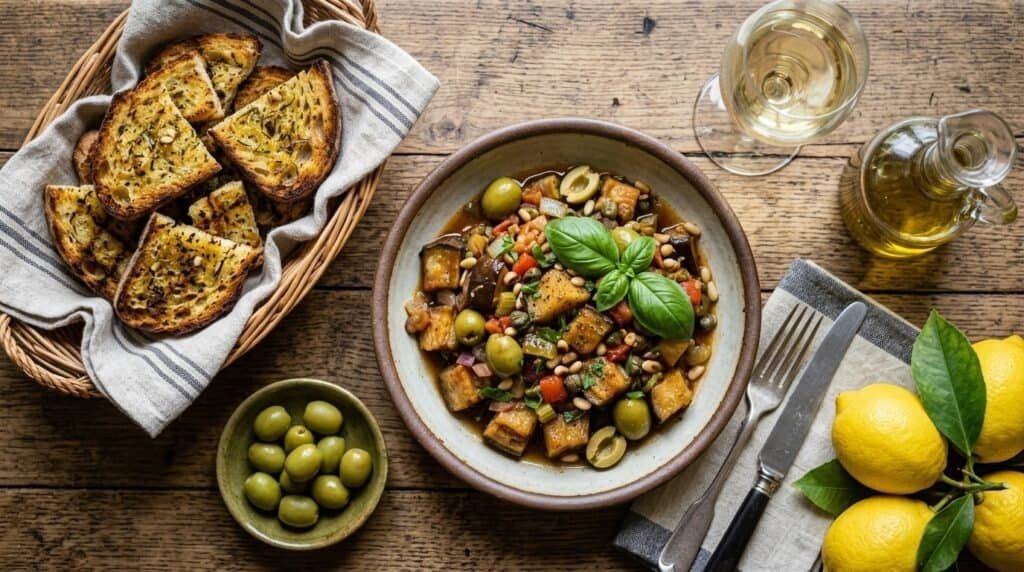
Some dishes get better the longer they sit. Caponata is one of them. It is a Sicilian eggplant stew built on a simple idea: soft, silky eggplant, sweet onion, juicy tomato, salty olives and capers, all pulled together with a splash of vinegar and a touch of sugar. The result is a bowl that tastes sweet, tangy, salty and rich at once.

It works as a side dish, a topping for toasted bread, a pasta sauce, or a main course with a green salad. It is also very forgiving. It tastes good warm, at room temperature or cold from the fridge, and it holds up for days.

This guide covers the ingredients, the cooking method, the small steps that keep the eggplant from turning greasy or mushy, how to balance the sweet and sour, and how to serve and store it.

What Is Caponata?

Caponata comes from Sicily, where it is served as an antipasto or a side dish. The flavor is called agrodolce, Italian for sweet and sour. Recipes vary from town to town. Some add peppers, some add raisins, some use almonds instead of pine nuts. The version here follows the classic idea: eggplant, celery, onion, tomato, green olives, capers, vinegar and a little sugar.

What makes it different from a typical vegetable stew is the vinegar and sugar. They cut through the richness of the olive oil and eggplant and give the dish its signature tang.

Ingredient Notes

  • Eggplant: Choose firm eggplants that feel heavy for their size with smooth, shiny skin. Small to medium ones have fewer seeds and less bitterness. Leave the skin on. It holds the cubes together and adds color.
  • Olive Oil: Eggplant soaks up oil like a sponge, which is why this recipe uses a generous amount. A good extra virgin olive oil adds flavor, so it is worth using here.
  • Green Olives: Mild, buttery varieties like Castelvetrano work well. Strongly brined olives can overpower the dish, so taste one first.
  • Capers: Rinse them well. Brined capers add a sharp, salty pop, and rinsing keeps the dish from turning too salty.
  • Tomatoes: Canned diced tomatoes give steady results year-round. In peak summer, about 1½ cups of chopped ripe tomatoes work well too.
  • Vinegar and Sugar: These two build the sweet and sour balance. Red wine vinegar is classic. White wine vinegar works as a substitute.
  • Pine Nuts: They add a soft, buttery crunch. They are expensive, so slivered almonds are a good substitute.

Pro Preparation & Cooking Rules

⚠️ Critical Step: Cook the Eggplant in Batches! Crowding the pan steams the eggplant instead of browning it, which gives gray, mushy cubes. Cook in two batches with room between pieces so each cube gets golden edges. This step decides the final texture of the whole dish.
⚠️ Critical Step: Add the Vinegar and Sugar Together, Then Taste! Stir in the vinegar and sugar at the same time so they balance each other. Let it cook for a couple of minutes, then taste. If it is too sharp, add a pinch more sugar. If it is too sweet, add a small splash of vinegar.
⚠️ Critical Step: Let It Rest Before Serving! Take the pan off the heat and let the caponata sit for at least 20 minutes. Flavors blend as it cools, and the vinegar mellows. Caponata tastes noticeably better after resting, and even better the next day.

Tips for Better Caponata & Common Mistakes

  • Keep Cubes Uniform: Even pieces cook at the same speed so none turn to mush while others stay firm.
  • Use a Wide Pan: More surface area means better browning and faster evaporation, yielding a thicker sauce.
  • Toast Pine Nuts Dry: Warm them in a dry pan for 2 to 3 minutes, shaking often, until lightly golden. Watch closely as they burn fast.
  • Don’t Overcrowd or Overcook: Overcrowding steams the eggplant. Cook until soft but still holding its shape.
  • Don’t Serve Right Away: Freshly cooked caponata tastes flatter and sharper. Resting is what rounds it out.

Variations Worth Trying

  • Add Bell Pepper: Dice half a red or yellow bell pepper and cook it with the onion for extra sweetness and color.
  • Add Raisins: Stir in 2 tablespoons of golden raisins with the olives for a traditional Sicilian sweet touch.
  • Use Almonds: Swap pine nuts for toasted slivered almonds.
  • Make It Spicier: Increase red pepper flakes or add a sliced fresh chili with the garlic.
  • Add Fresh Mint: A little chopped mint at the end gives a bright, cool contrast.
  • Roast the Eggplant: For less oil, toss cubes with 2 tablespoons of oil and roast at 425°F (220°C) for 20 to 25 minutes before adding to the sauce.

How to Serve Caponata

  • On toasted bread as a starter or snack (crostini/bruschetta).
  • Alongside grilled fish or chicken.
  • Tossed with warm pasta for a quick main.
  • Over polenta or creamy white beans.
  • As part of a mezze or antipasto board with cheese, cured meats, and marinated vegetables.
  • Spooned over a sandwich with fresh mozzarella.
  • Wine Pairing: Crisp dry white wine (Vermentino or Grillo) or a light red (Nero d’Avola).

Make-Ahead, Storage, and Reheating

Make Ahead: Caponata is better made a day in advance. Store covered in the fridge overnight, then bring to room temperature before serving.

Storing Leftovers: Keep in an airtight container in the refrigerator for up to 5 days.

Reheating: Serve cold, room temperature, or warm gently in a pan over low heat for 5 to 8 minutes.

Freezing: Freeze in an airtight container for up to 2 months. Thaw overnight in the fridge. (Eggplant softens slightly upon thawing, but flavor remains great).

Frequently Asked Questions

Do I have to salt the eggplant?
Not always. Salting helps with bitterness and oil absorption, especially for larger/older eggplants. Small, fresh ones are fine without it.

Why is my caponata too sour?
Too much vinegar or not enough sugar. Add a pinch of sugar, simmer for a minute, and taste again. Resting also softens sharpness.

Why is my caponata too oily?
Eggplant absorbs oil fast. Drying cubes well and browning in batches helps. You can also blot lightly with paper towels or use the roasting method.

Can I make caponata without capers?
Yes, but it loses some salty punch. Add a few extra olives to compensate.

Can I use frozen eggplant?
Not ideal as it releases water and turns soft. Fresh gives much better texture.

Is caponata vegan?
Yes, as written. It contains no gluten, dairy, or eggs (bread is the only gluten source).

Can I serve it hot?
Yes, but many prefer room temperature where flavors are fullest.

What can I use instead of pine nuts?
Toasted almonds, walnuts, or sunflower seeds all work well.

Sicilian Caponata (Sweet and Sour Eggplant Stew)

A classic Sicilian sweet and sour eggplant stew with celery, onions, tomatoes, olives, capers, and pine nuts, served warm, room temperature, or chilled with garlic toast.
Prep Time 20 minutes
Cook Time 40 minutes
Total Time 1 hour
Servings: 6 peoples
Course: Appetizer, Side Dish
Cuisine: Italian, Sicilian

Ingredients
  

For the Caponata:
  • 2 medium eggplants about 1½ lb / 680 g, cut into ¾-inch cubes
  • 1 tsp salt for optional salting
  • 1/3 cup 80 ml extra virgin olive oil, divided
  • 1 large yellow onion thinly sliced
  • 2 celery stalks diced
  • 3 garlic cloves minced
  • 1 can 14.5 oz / 410 g diced tomatoes, with juices
  • 1/2 cup 75 g pitted green olives, halved
  • 2 tbsp capers drained and rinsed
  • 2 tbsp red wine vinegar
  • 1 tbsp sugar
  • 1/4 tsp black pepper
Pinch of red pepper flakes (optional)
  • 2 tbsp pine nuts toasted
  • 2 tbsp chopped fresh parsley or basil
For the Garlic Toast:
  • 6 slices crusty bread
  • 2 tbsp olive oil
  • 1 garlic clove halved
Pinch of flaky salt

Method
 

  1. Optional Salting: Toss cubed eggplant with 1 tsp salt in a colander and let sit for 30 minutes. Rinse briefly and pat completely dry.
  2. Brown Eggplant: Heat 3 tbsp olive oil in a wide skillet over medium-high heat. Brown half the eggplant for 5–6 minutes. Move to a plate, add 2 tbsp oil, and brown the second batch. Set aside.
  3. Soften Vegetables: Lower heat to medium, add 1 tbsp oil, sliced onion, diced celery, and a pinch of salt. Cook 7–8 minutes until soft and golden.
  4. Add Garlic: Stir in minced garlic and red pepper flakes. Cook 1 minute until fragrant.
  5. Simmer Tomatoes: Add diced tomatoes with juices. Simmer for 10 minutes until sauce thickens slightly.
  6. Sweet and Sour: Stir in red wine vinegar and sugar together. Cook 2 minutes, taste, and adjust sweetness/sourness if needed.
  7. Combine & Finish: Return eggplant to the pan along with green olives, capers, and black pepper. Cover partially and simmer on low for 10 minutes until silky and tender.
  8. Rest: Remove from heat and let sit for at least 20 minutes for flavors to meld.
  9. Garlic Toast: Brush bread slices with olive oil and toast at 400°F (200°C) for 5–6 minutes. Rub warm slices with garlic clove and sprinkle with flaky salt.
  10. Serve: Top caponata with toasted pine nuts and fresh herbs. Serve warm or at room temperature with garlic toast.
Jump to Recipe